Apply guardrail policies automatically to any key or team that has a specific tag. Instead of attaching policies one-by-one, tag your keys and let the policy engine handle the rest. **Example:** Your security team requires all healthcare-related keys to run PII masking and PHI detection. Tag those keys with `health`, create a single tag-based attachment, and every matching key gets the guardrails automatically.
Installs into .claude/skills of the current project.
Are you the author of 2451 Policy Tags Dce6e132?
Add the live security badge to your README. It updates with every re-scan.
[](https://www.skillsdirectory.com/skills/tools-only-2451-policy-tags-dce6e132)
# Tag-Based Policy Attachments
Apply guardrail policies automatically to any key or team that has a specific tag. Instead of attaching policies one-by-one, tag your keys and let the policy engine handle the rest.
**Example:** Your security team requires all healthcare-related keys to run PII masking and PHI detection. Tag those keys with `health`, create a single tag-based attachment, and every matching key gets the guardrails automatically.
## 1. Create a Policy with Guardrails
Navigate to **Policies** in the left sidebar. You'll see a list of existing policies along with their guardrails.
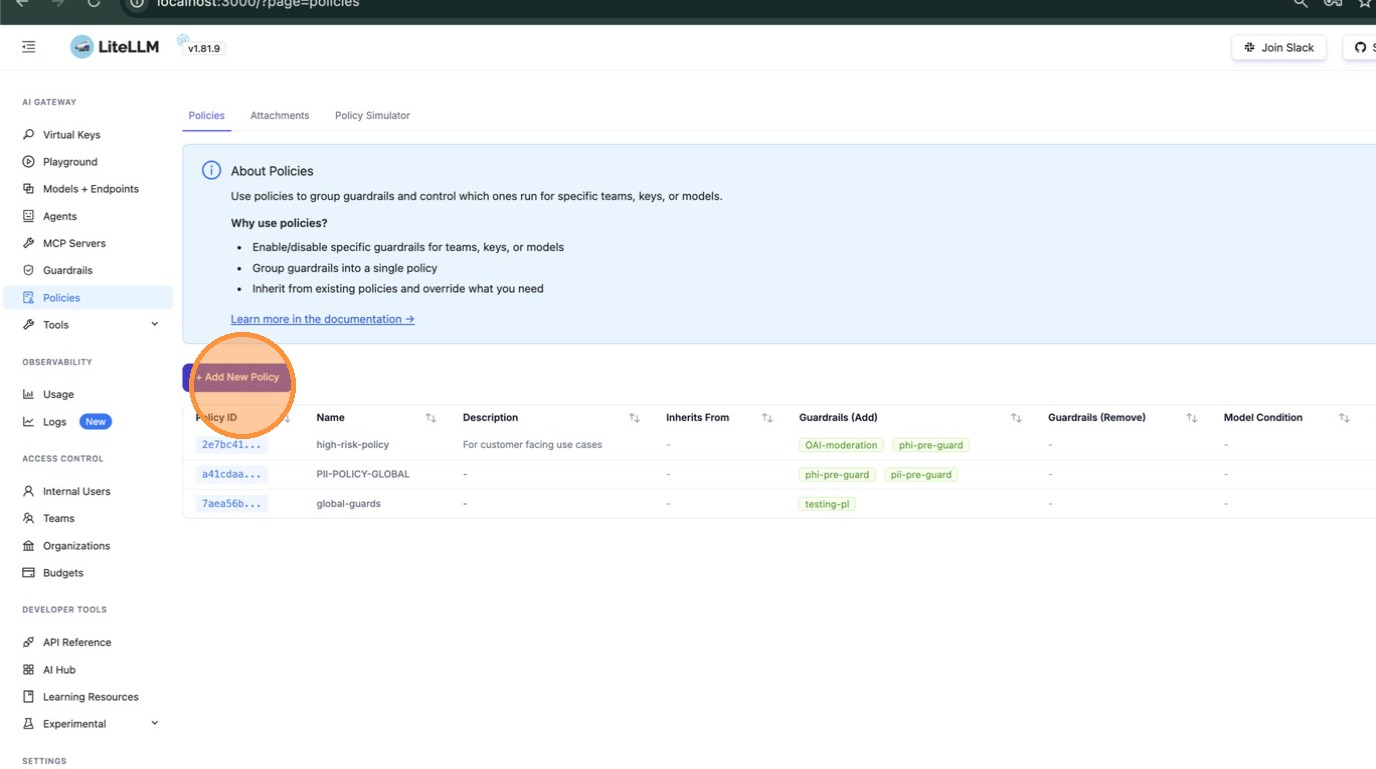
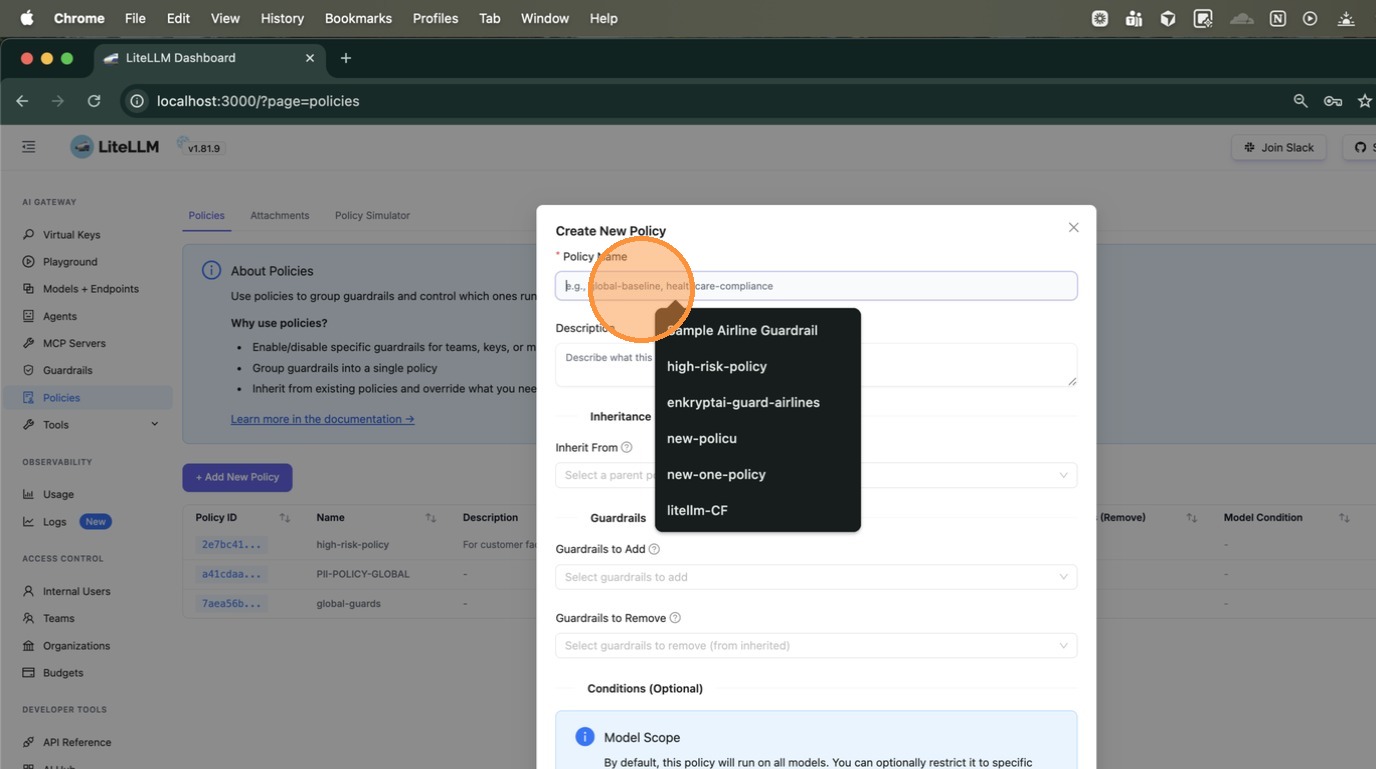
Click **+ Add New Policy**. In the modal, enter a name for your policy (e.g., `high-risk-policy2`). You can also type to search existing policy names if you want to reference them.
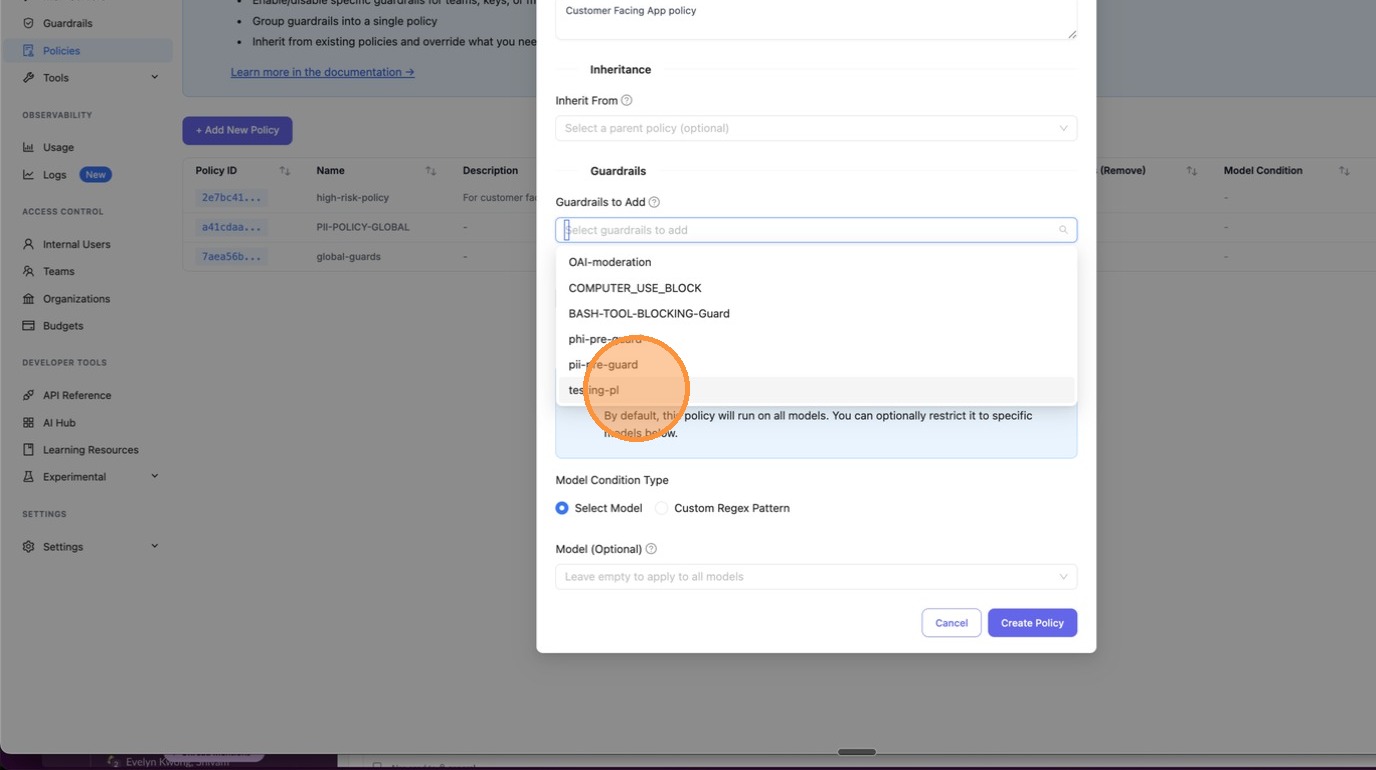
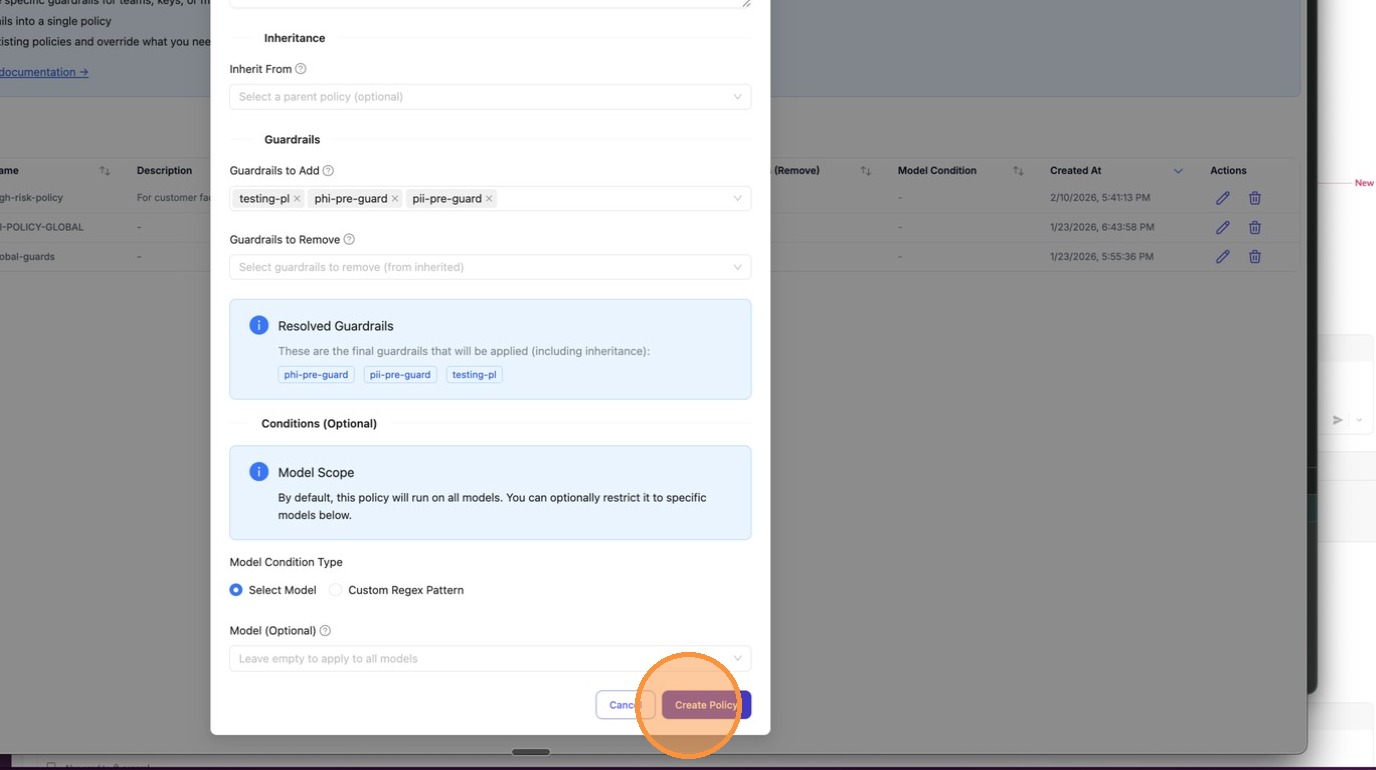
Scroll down to **Guardrails to Add**. Click the dropdown to see all available guardrails configured on your proxy — select the ones this policy should enforce.
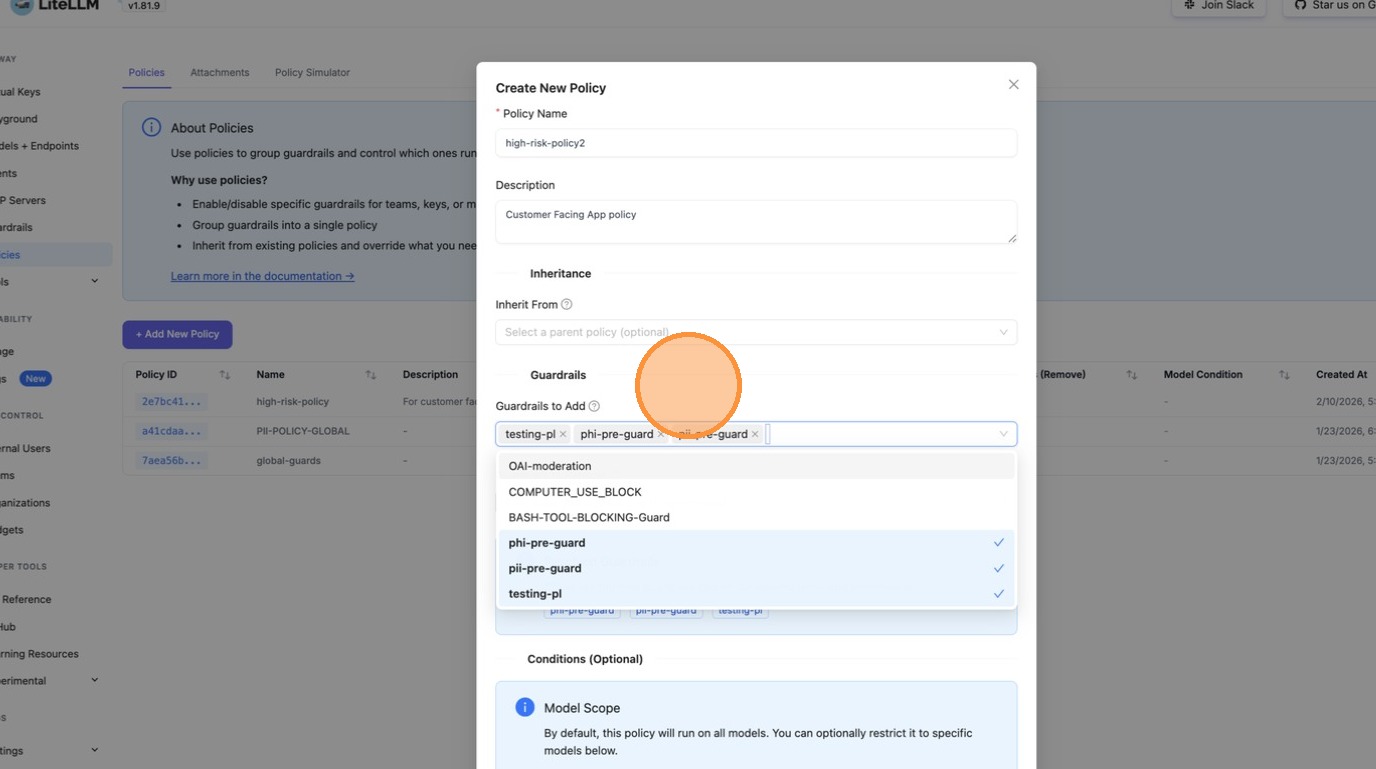
After selecting your guardrails, they appear as chips in the input field. The **Resolved Guardrails** section below shows the final set that will be applied (including any inherited from a parent policy).
Click **Create Policy** to save.
## 2. Add a Tag Attachment for the Policy
After creating the policy, switch to the **Attachments** tab. This is where you define *where* the policy applies.
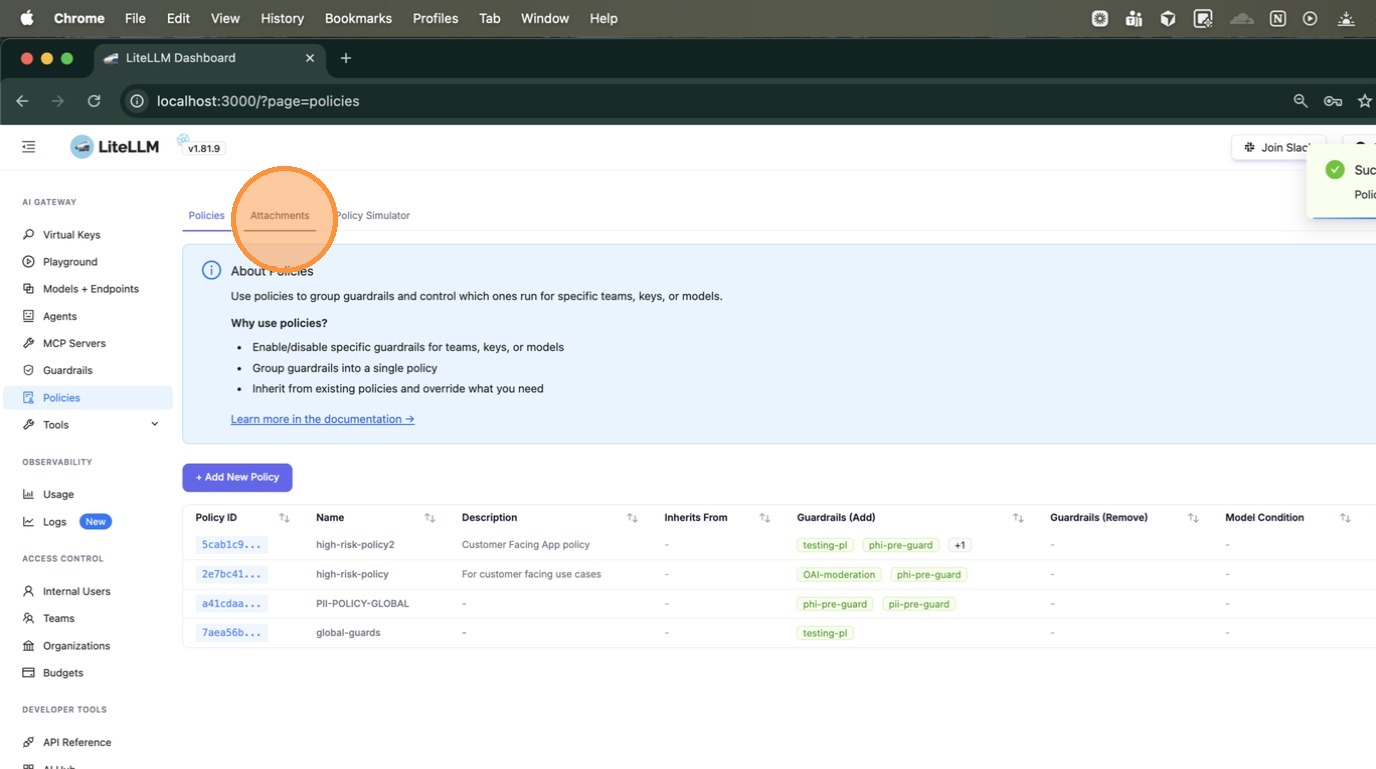
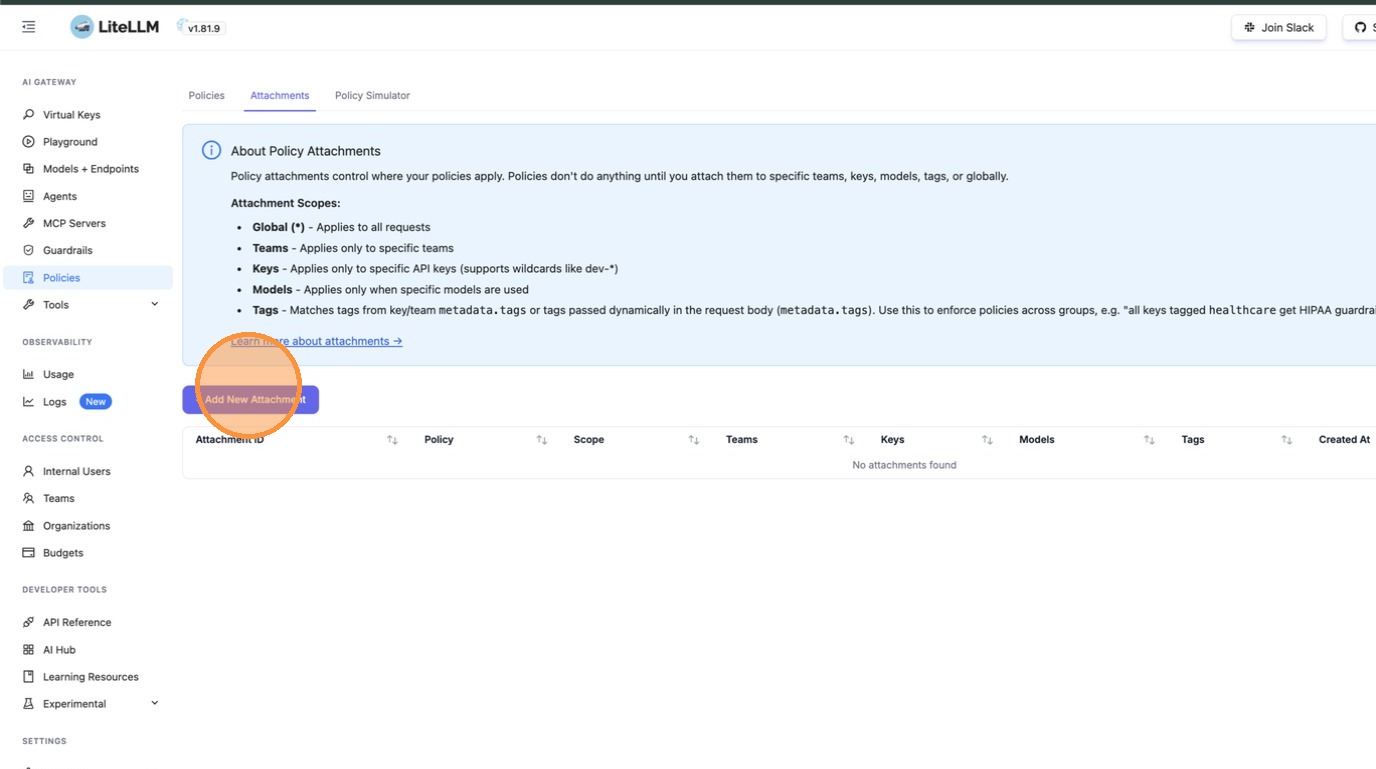
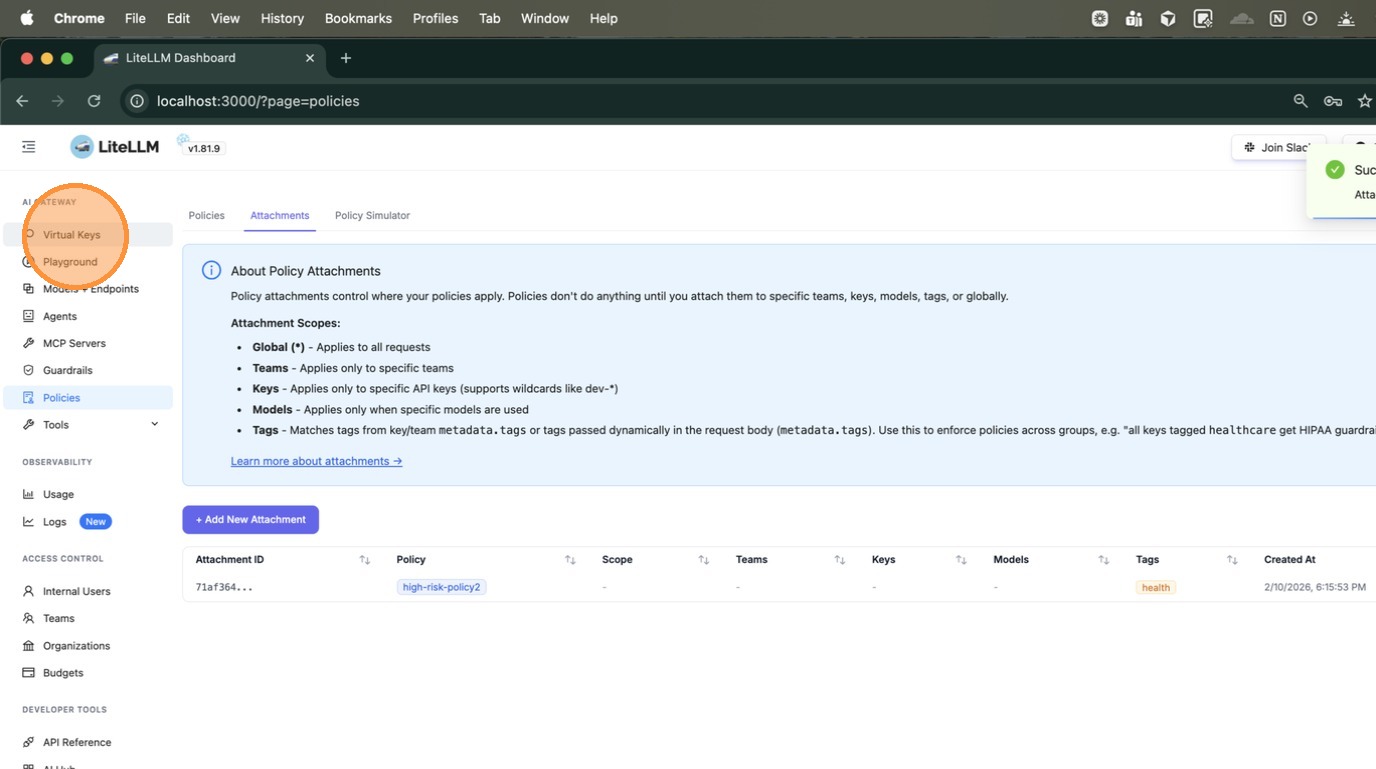
Click **+ Add New Attachment**. The Attachments page explains the available scopes: Global, Teams, Keys, Models, and **Tags**.
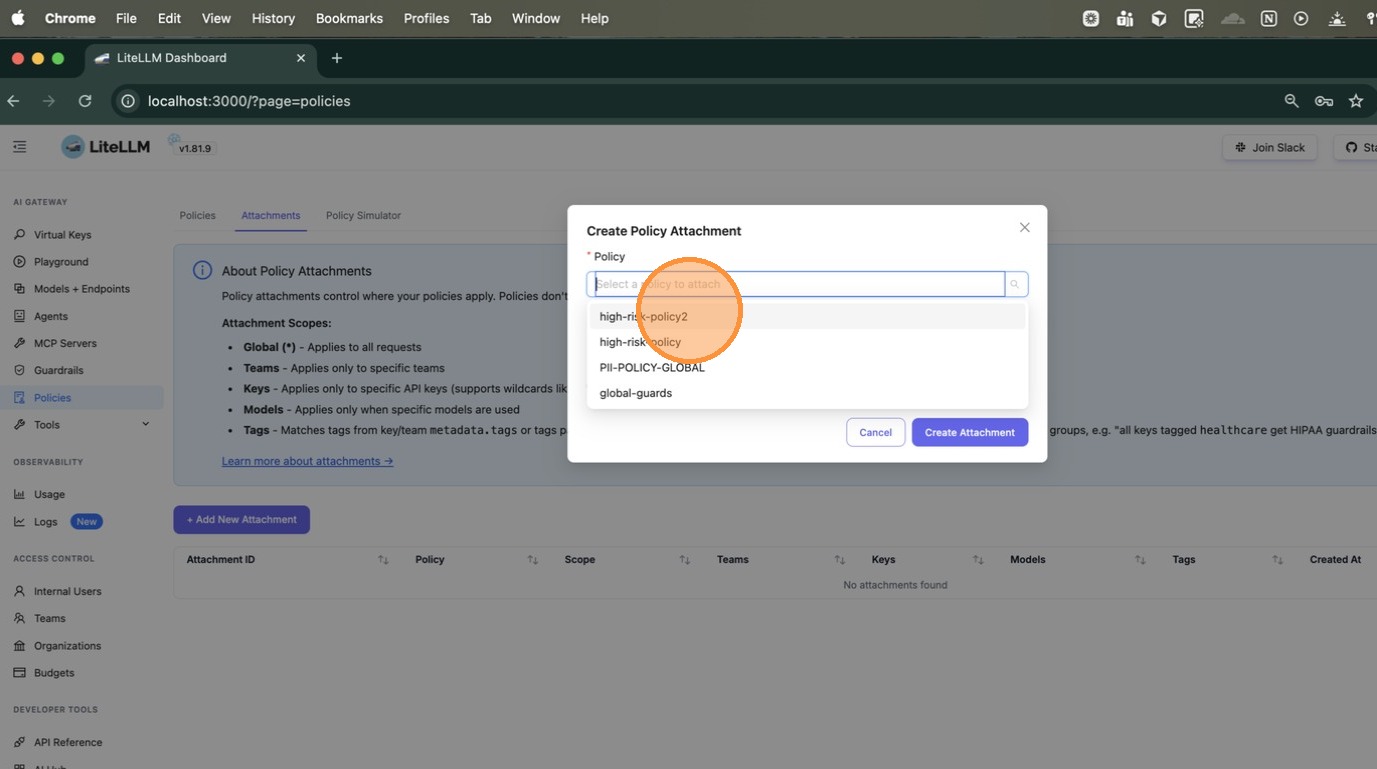
In the **Create Policy Attachment** modal, first select the policy you just created from the dropdown.
Choose **Specific (teams, keys, models, or tags)** as the scope type. This expands the form to show fields for Teams, Keys, Models, and Tags.
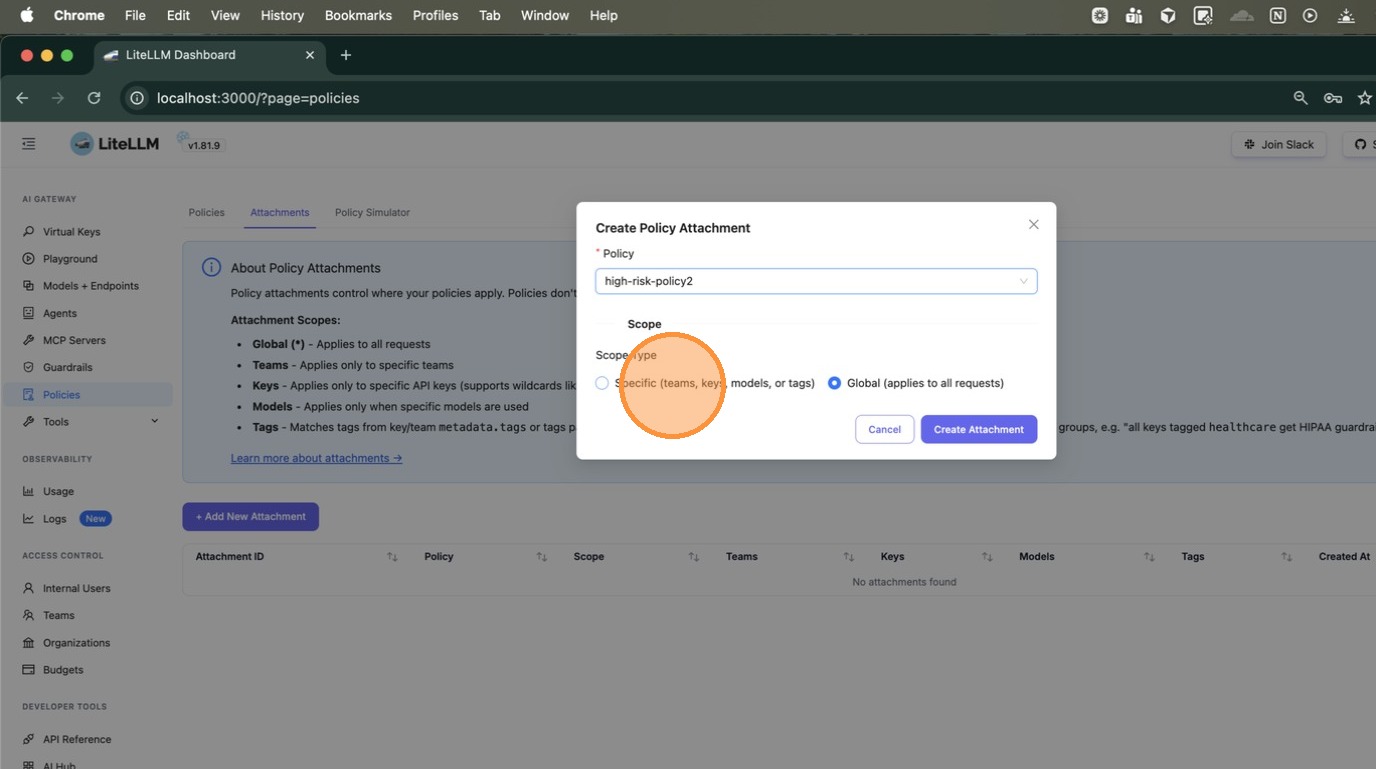
Scroll down to the **Tags** field and type the tag to match — here we enter `health`. You can enter any string, or use a wildcard pattern like `health-*` to match all tags starting with `health-` (e.g., `health-team`, `health-dev`).
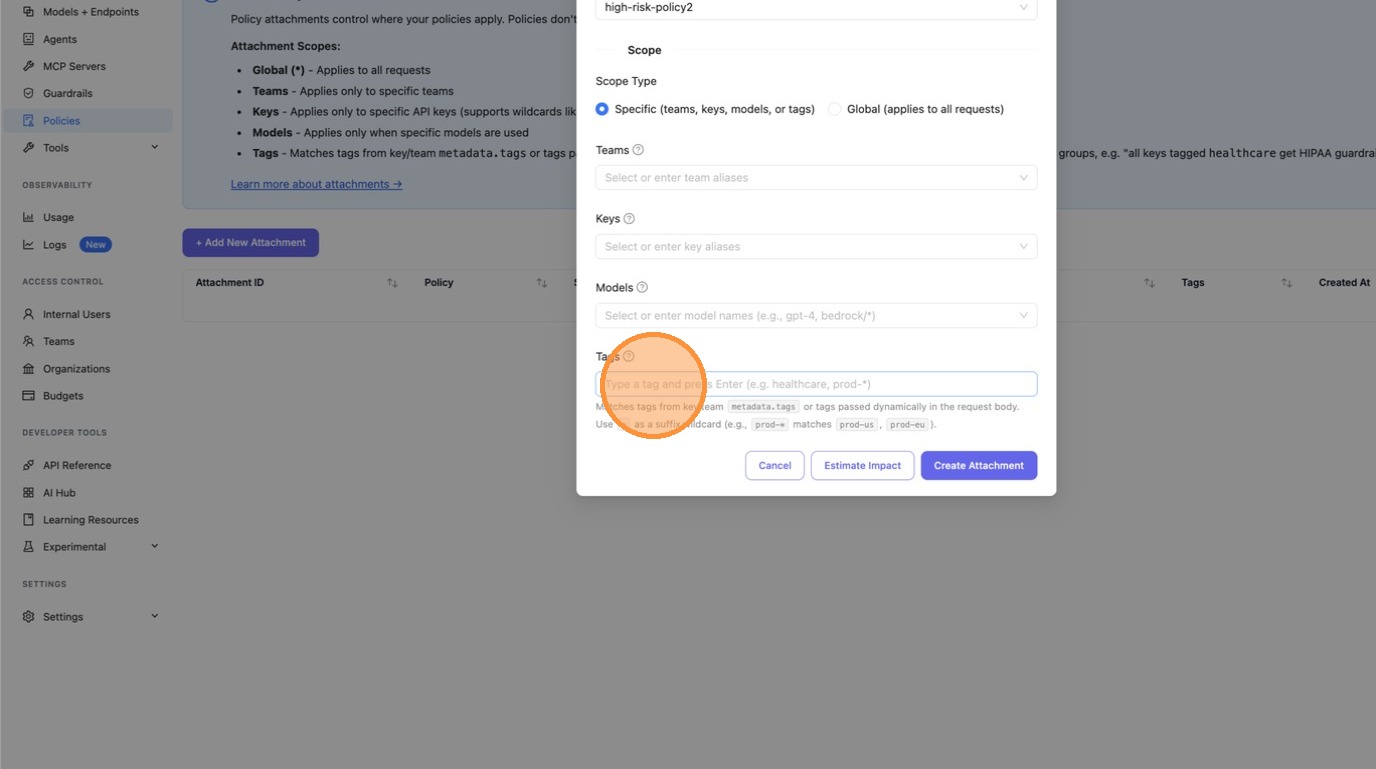
## 3. Check the Impact of the Attachment
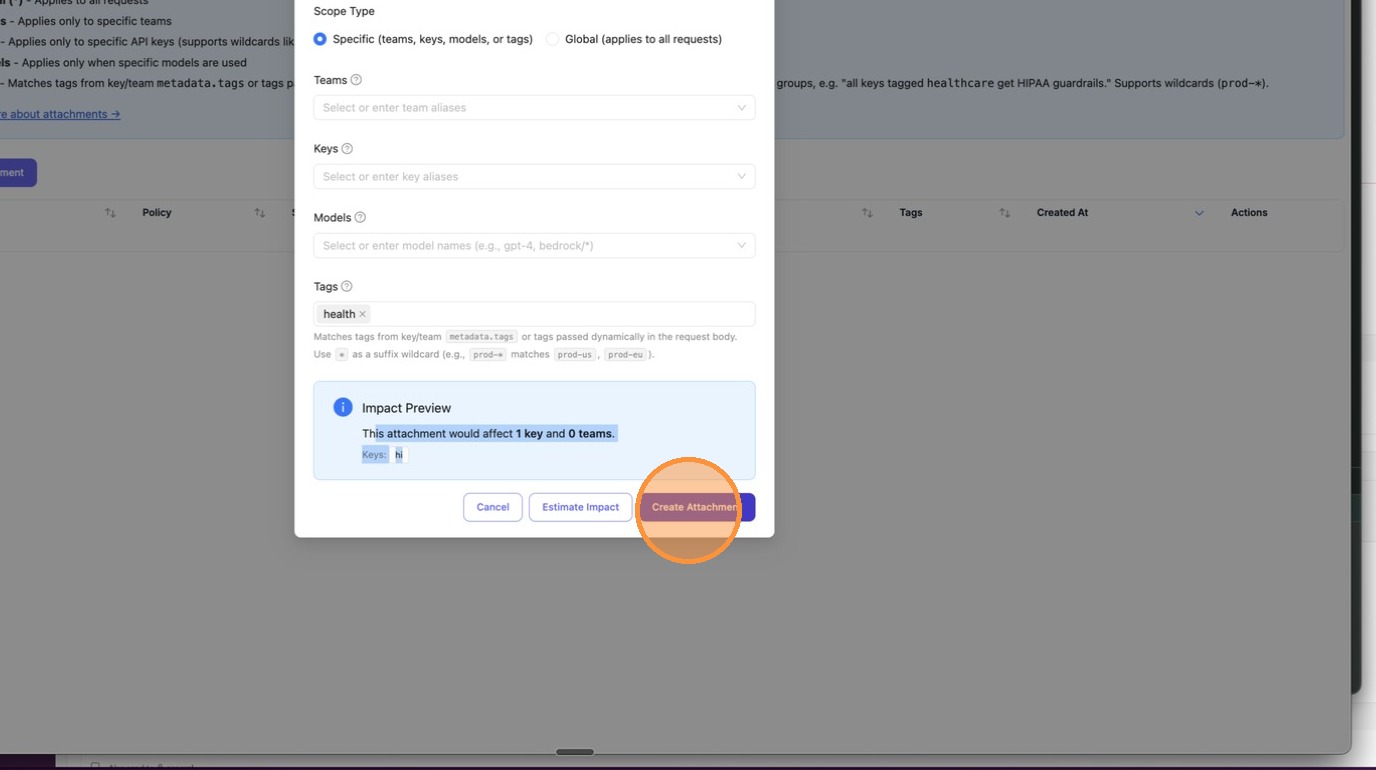
Before creating the attachment, click **Estimate Impact** to preview how many keys and teams would be affected. This is your blast-radius check — make sure the scope is what you expect before applying.
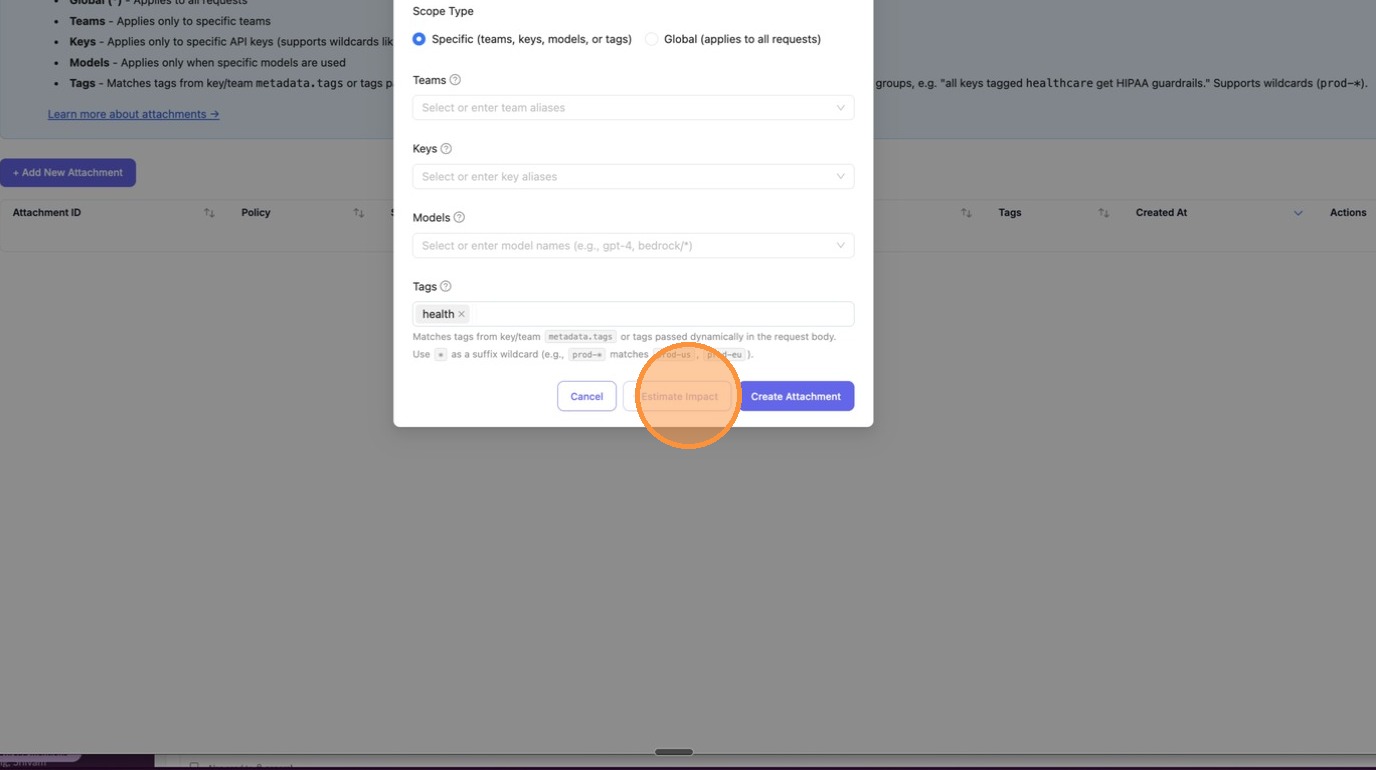
The **Impact Preview** appears inline, showing exactly how many keys and teams would be affected. In this example: "This attachment would affect **1 key** and **0 teams**", with the key alias `hi` listed.
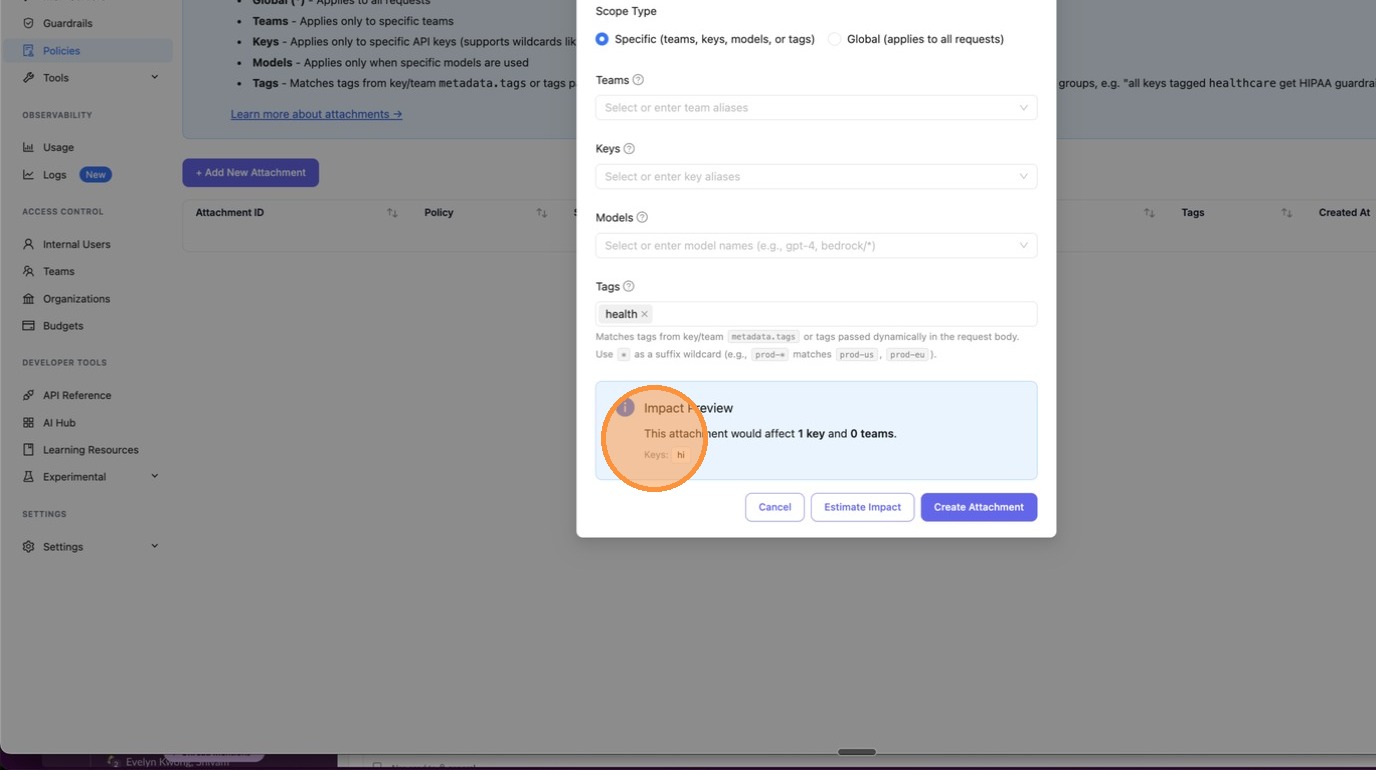
Once you're satisfied with the impact, click **Create Attachment** to save.
The attachment now appears in the table with the policy name `high-risk-policy2` and tag `health` visible.
## 4. Create a Key with the Tag
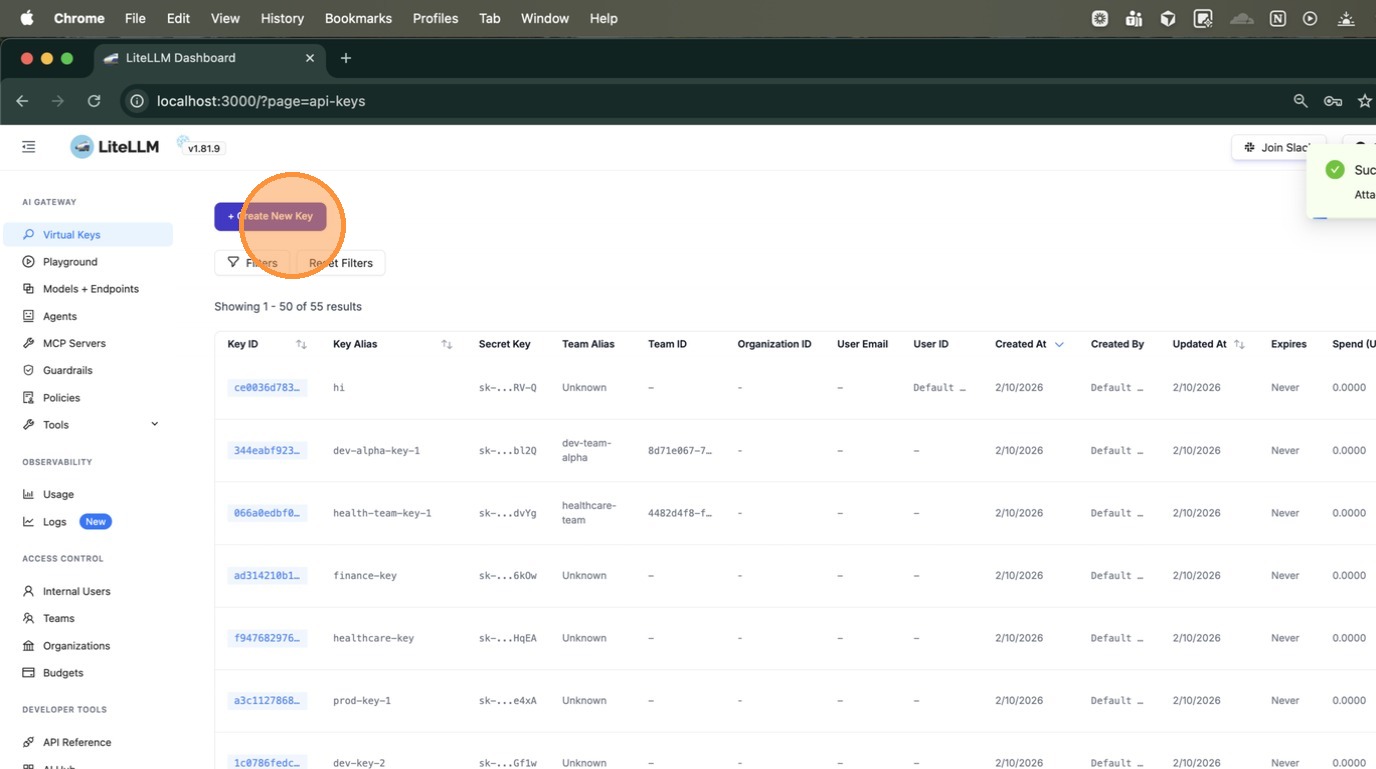
Navigate to **Virtual Keys** in the left sidebar. Click **+ Create New Key**.
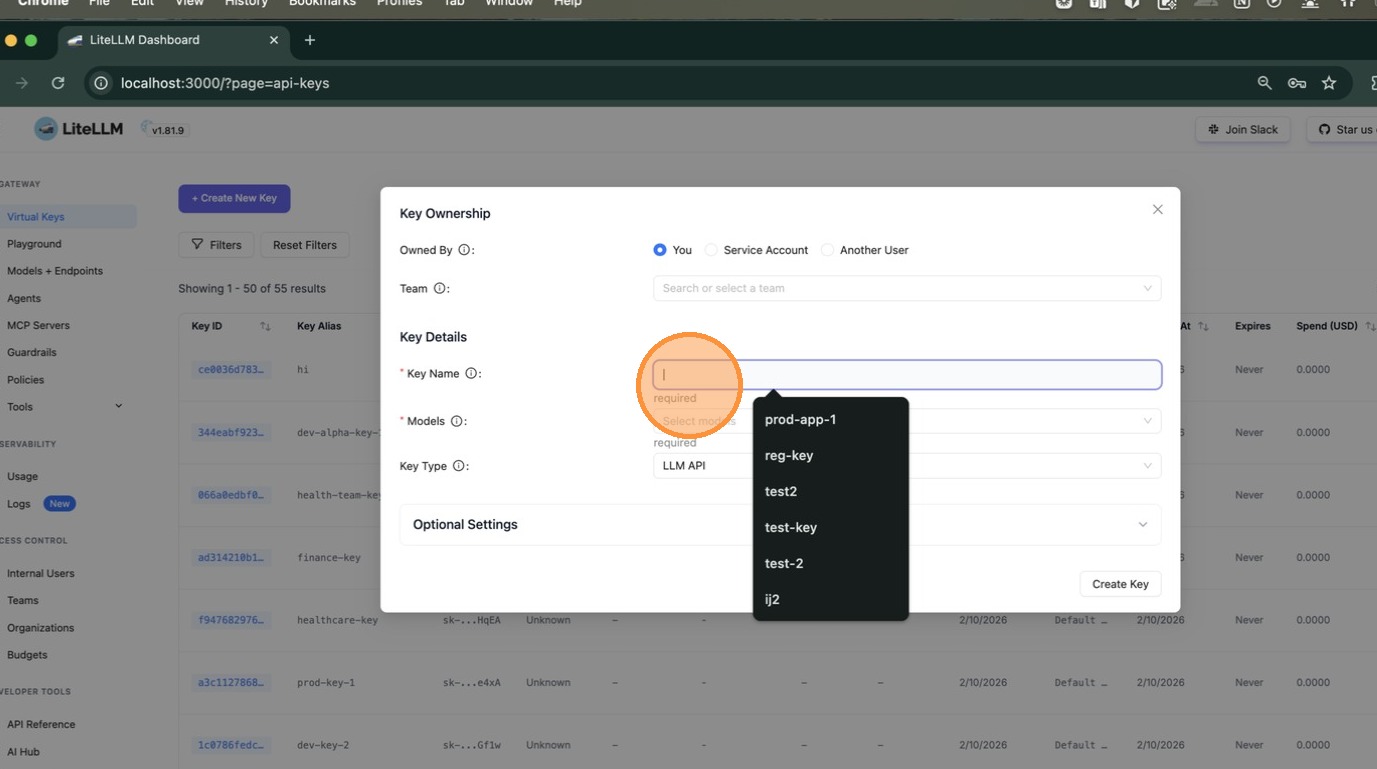
Enter a key name and select a model. Then expand **Optional Settings** and scroll down to the **Tags** field.
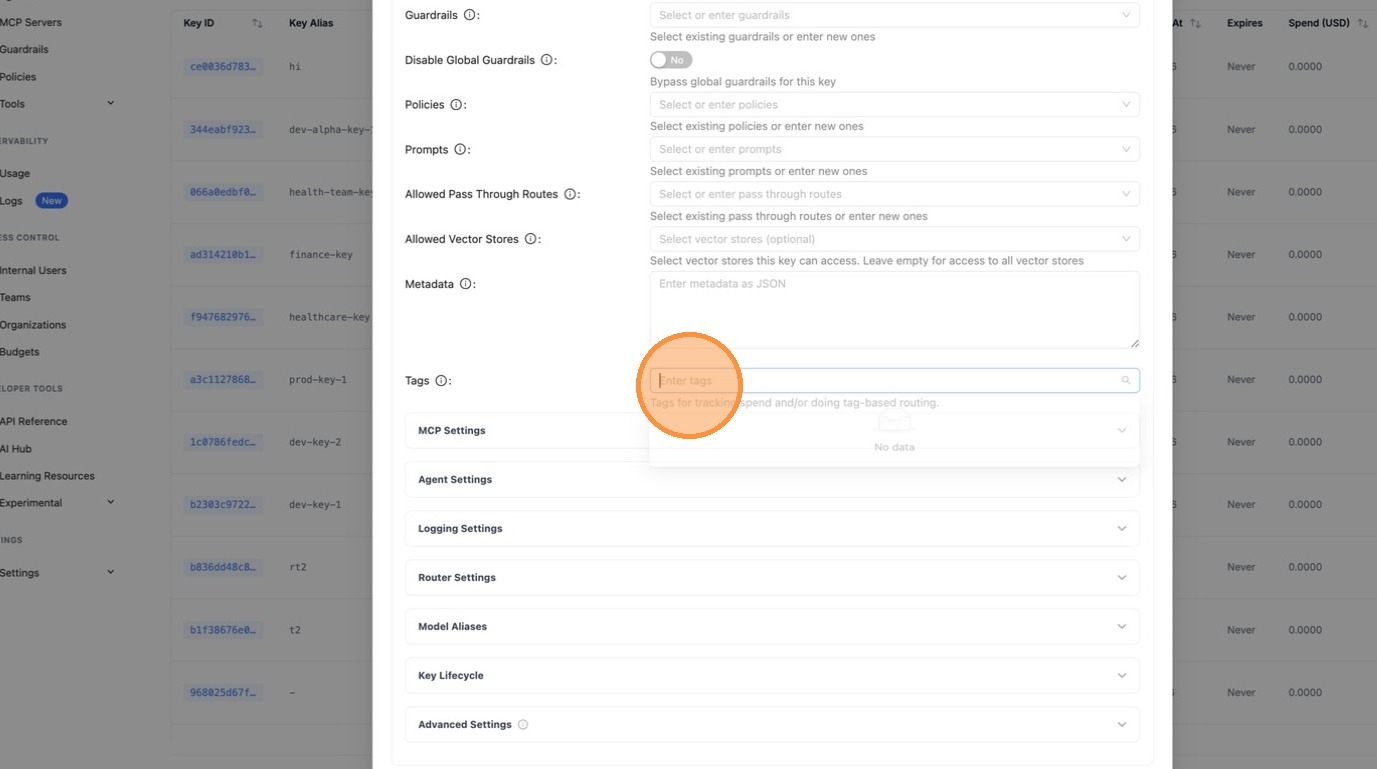
In the **Tags** field, type `health` and press Enter. This is the tag the policy engine will match against.
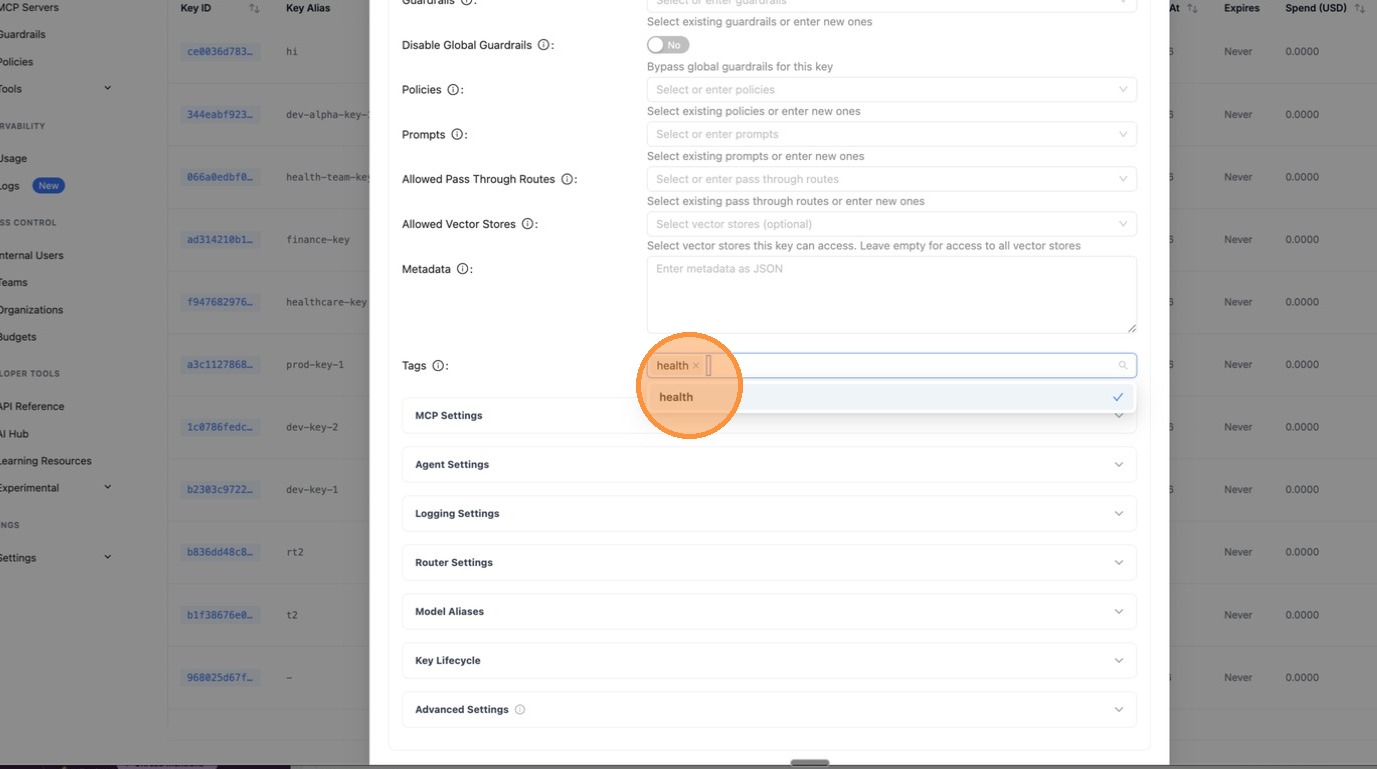
The tag `health` now appears as a chip in the Tags field. Confirm your settings look correct.
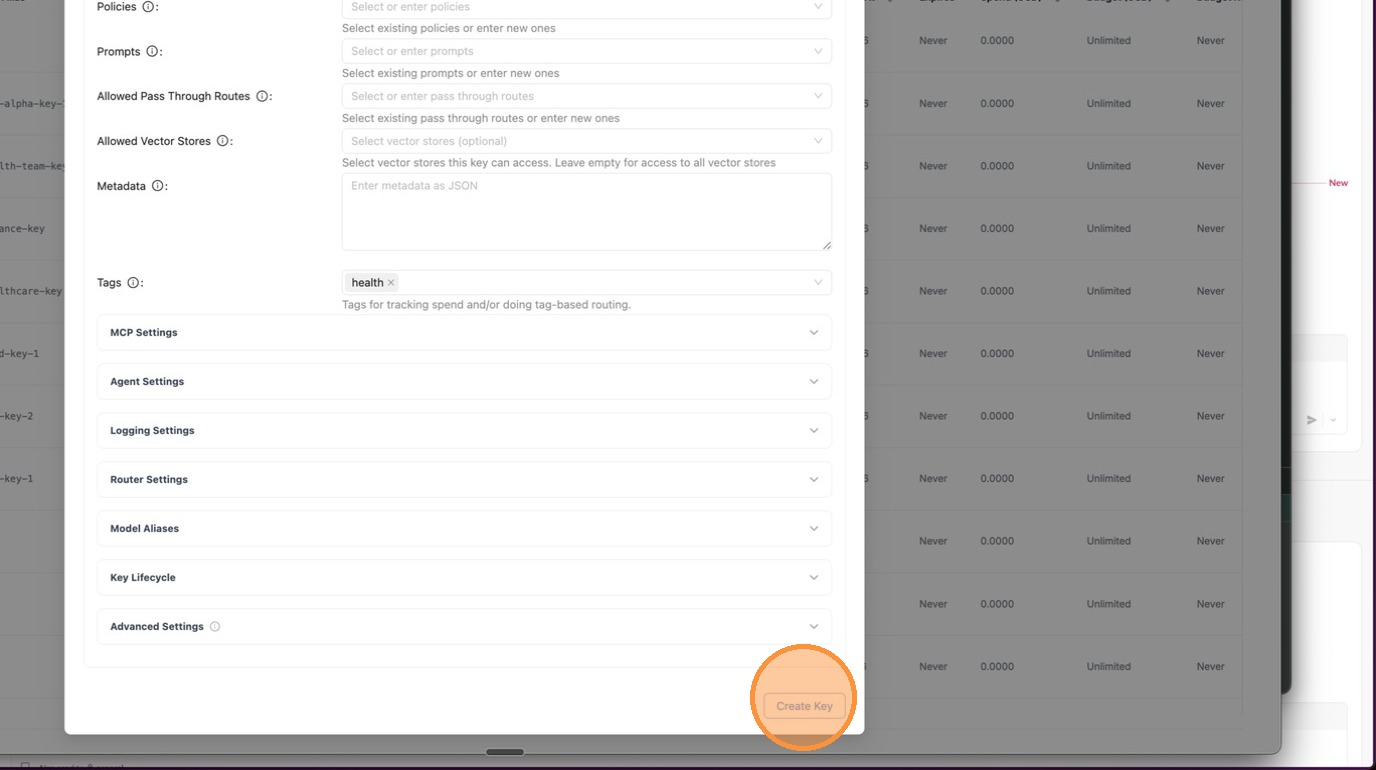
Click **Create Key** at the bottom of the form.
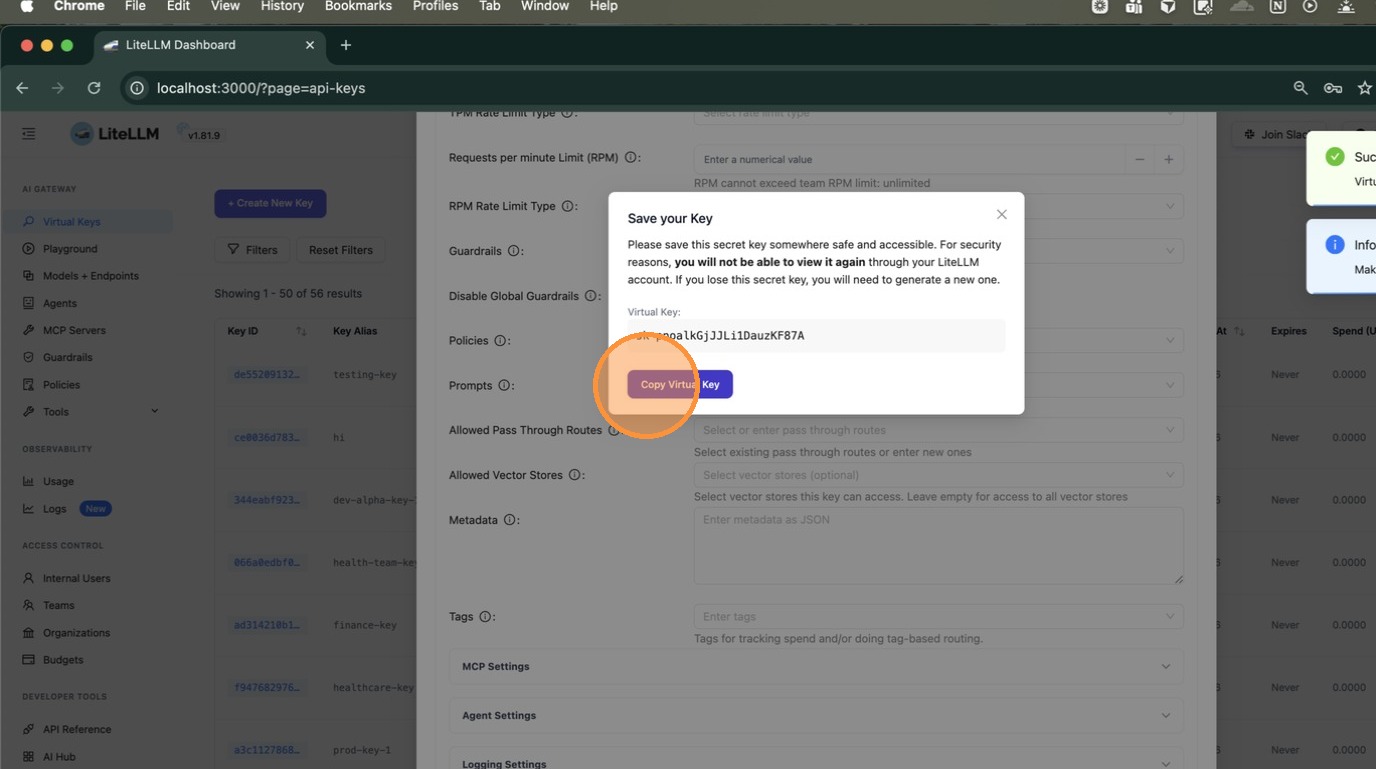
A dialog appears with your new virtual key. Click **Copy Virtual Key** — you'll need this to test in the next step.
## 5. Test the Key and Validate the Policy is Applied
Navigate to **Playground** in the left sidebar to test the key interactively.
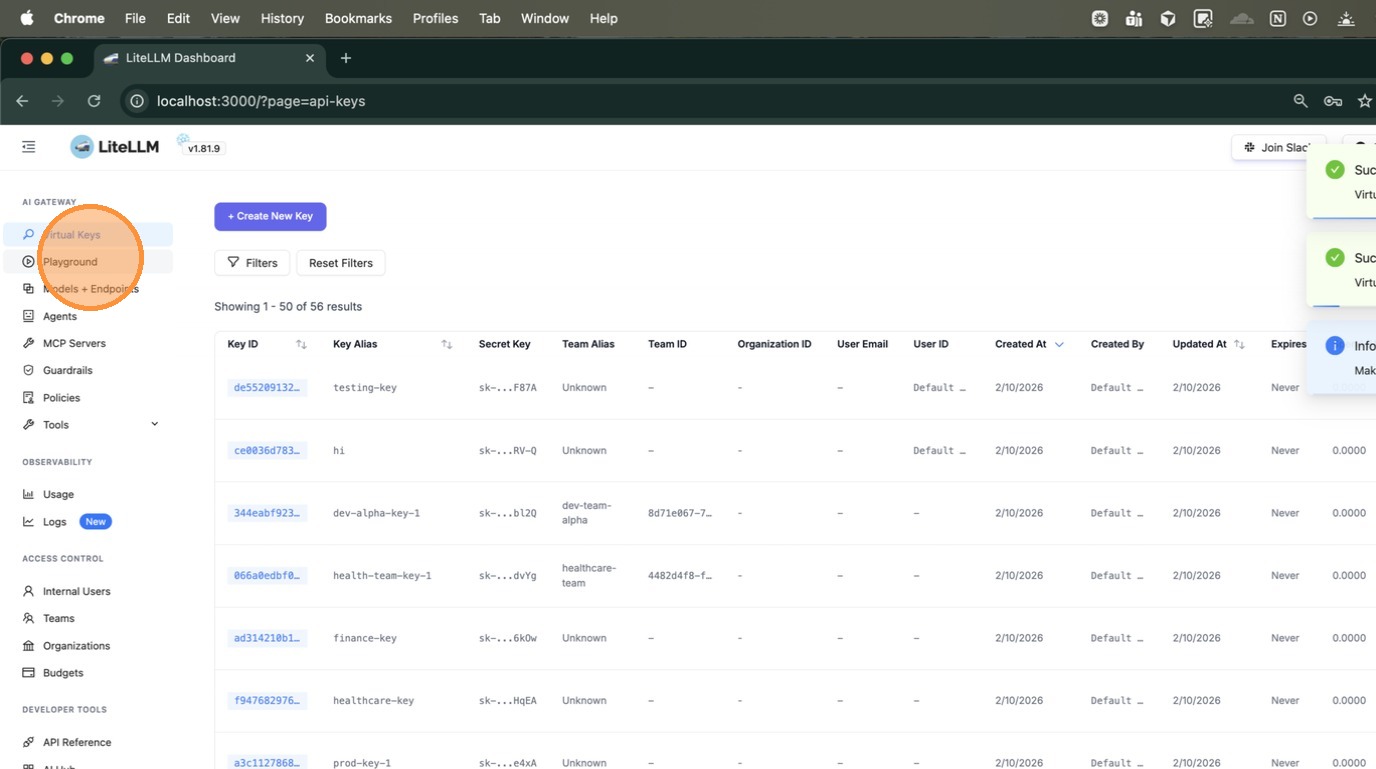
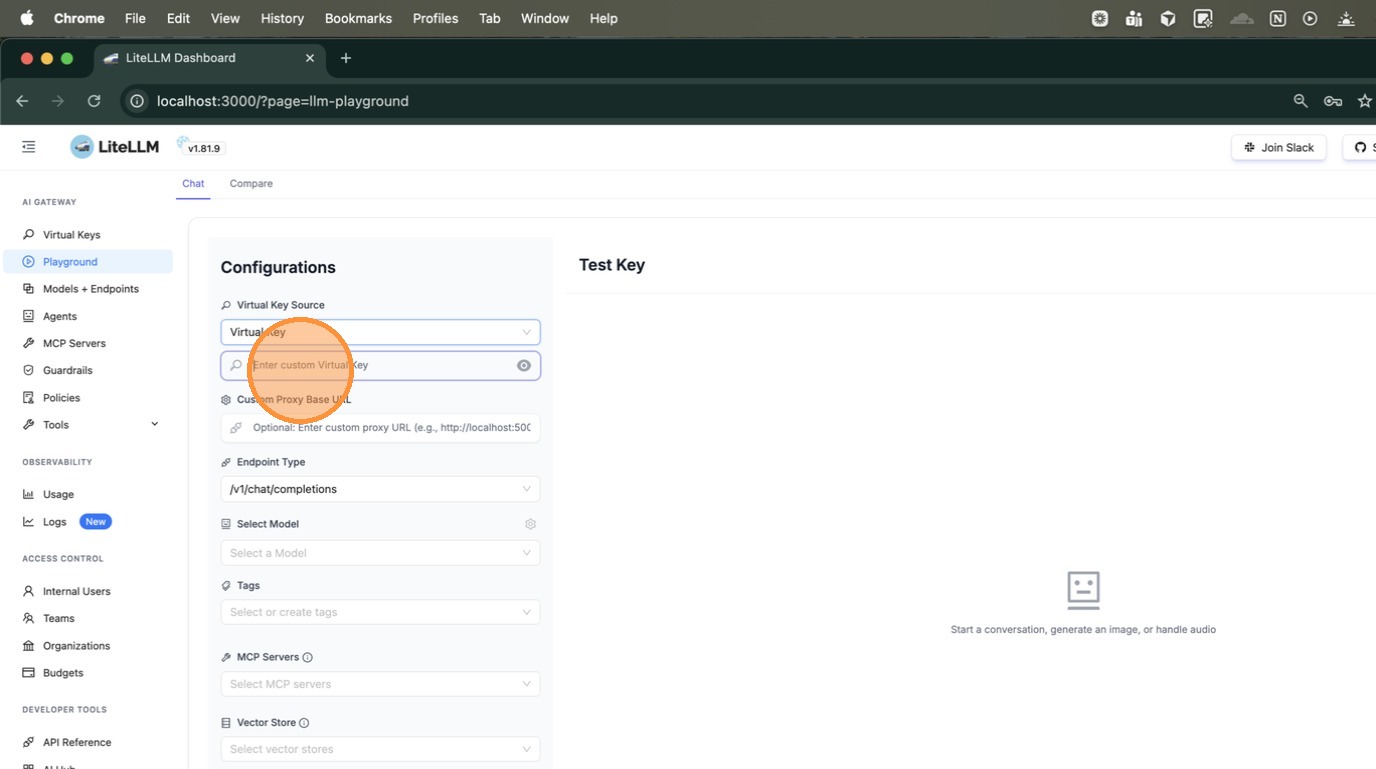
Under **Virtual Key Source**, select "Virtual Key" and paste the key you just copied into the input field.
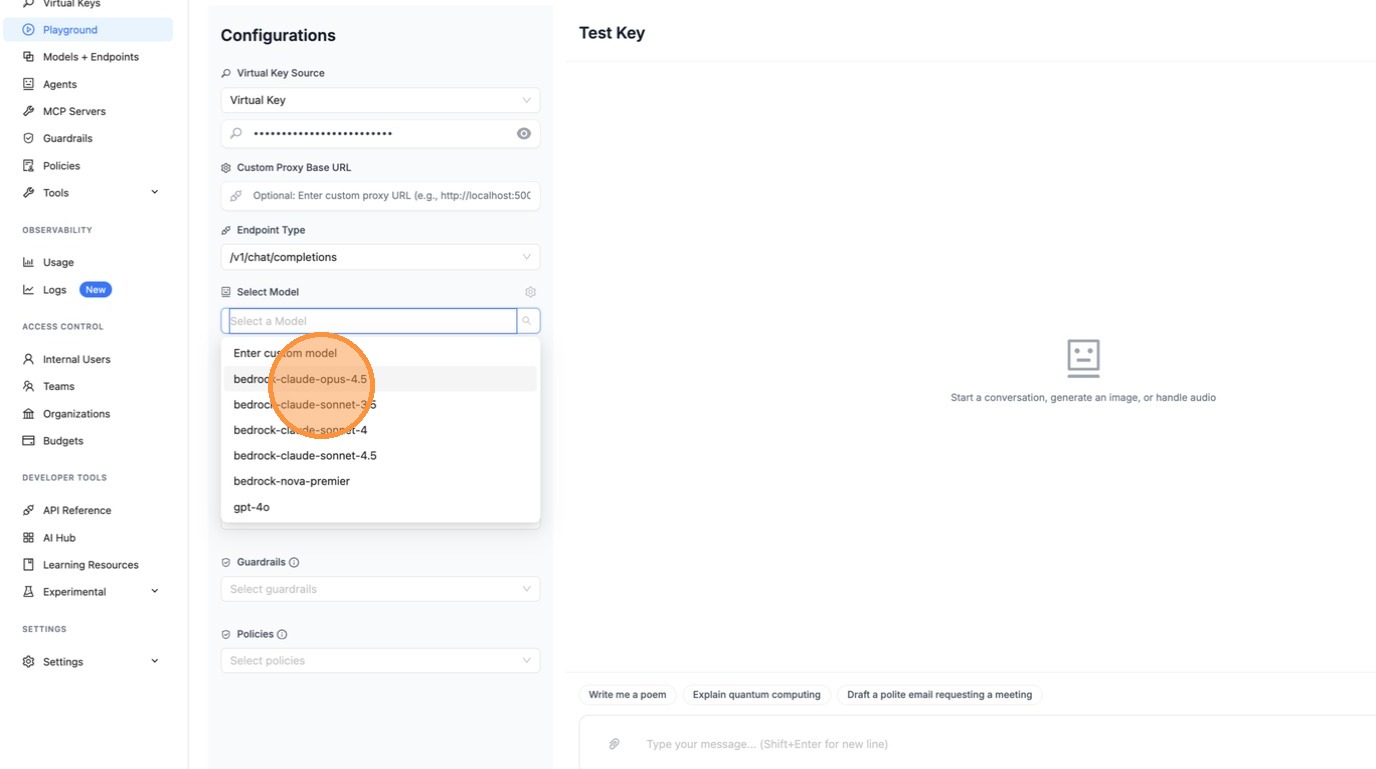
Select a model from the **Select Model** dropdown.
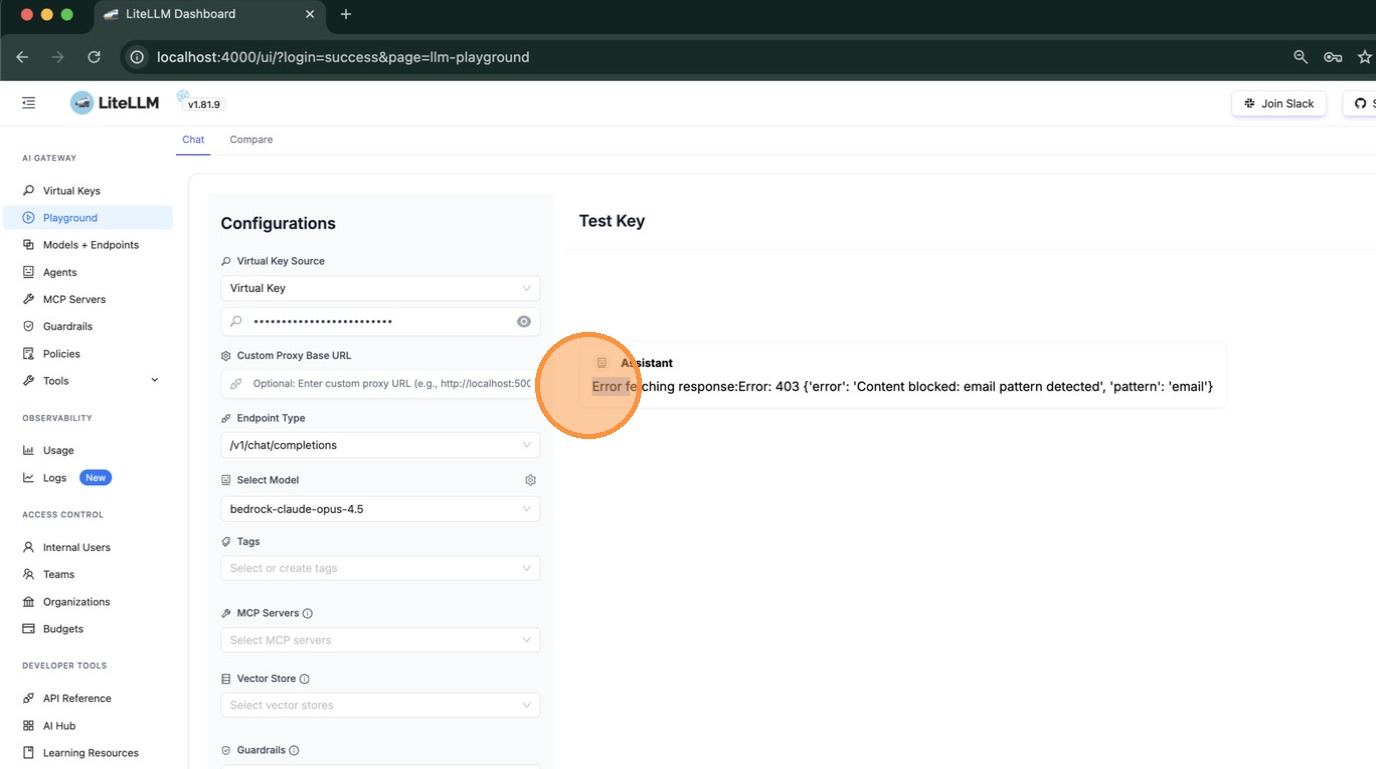
Type a message and press Enter. If a guardrail blocks the request, you'll see it in the response. In this example, the `testing-pl` guardrail detected an email pattern and returned a 403 error — confirming the policy is working.
**Using curl:**
You can also verify via the command line. The response headers confirm which policies and guardrails were applied:
```bash
curl -v http://localhost:4000/chat/completions \
-H "Authorization: Bearer <your-tagged-key>" \
-H "Content-Type: application/json" \
-d '{
"model": "gpt-4o",
"messages": [{"role": "user", "content": "say hi"}]
}'
```
Check the response headers:
```
x-litellm-applied-policies: high-risk-policy2
x-litellm-applied-guardrails: pii-pre-guard,phi-pre-guard,testing-pl
x-litellm-policy-sources: high-risk-policy2=tag:health
```
| Header | What it tells you |
|--------|-------------------|
| `x-litellm-applied-policies` | Which policies matched this request |
| `x-litellm-applied-guardrails` | Which guardrails actually ran |
| `x-litellm-policy-sources` | **Why** each policy matched — `tag:health` confirms it was the tag |

