Control which MCP servers are visible to external callers (e.g., ChatGPT, Claude Desktop) vs. internal-only callers. This is useful when you want a subset of your MCP servers available publicly while keeping sensitive servers restricted to your private network.
Installs into .claude/skills of the current project.
Are you the author of 2166 Mcp Public Internet Ab9f4a8e?
Add the live security badge to your README. It updates with every re-scan.
[](https://www.skillsdirectory.com/skills/tools-only-2166-mcp-public-internet-ab9f4a8e)
import Tabs from '@theme/Tabs';
import TabItem from '@theme/TabItem';
# Exposing MCPs on the Public Internet
Control which MCP servers are visible to external callers (e.g., ChatGPT, Claude Desktop) vs. internal-only callers. This is useful when you want a subset of your MCP servers available publicly while keeping sensitive servers restricted to your private network.
## Overview
| Property | Details |
|-------|-------|
| Description | IP-based access control for MCP servers — external callers only see servers marked as public |
| Setting | `available_on_public_internet` on each MCP server |
| Network Config | `mcp_internal_ip_ranges` in `general_settings` |
| Supported Clients | ChatGPT, Claude Desktop, Cursor, OpenAI API, or any MCP client |
## How It Works
When a request arrives at LiteLLM's MCP endpoints, LiteLLM checks the caller's IP address to determine whether they are an **internal** or **external** caller:
1. **Extract the client IP** from the incoming request (supports `X-Forwarded-For` when configured behind a reverse proxy).
2. **Classify the IP** as internal or external by checking it against the configured private IP ranges (defaults to RFC 1918: `10.0.0.0/8`, `172.16.0.0/12`, `192.168.0.0/16`, `127.0.0.0/8`).
3. **Filter the server list**:
- **Internal callers** see all MCP servers (public and private).
- **External callers** only see servers with `available_on_public_internet: true`.
This filtering is applied at every MCP access point: the MCP registry, tool listing, tool calling, dynamic server routes, and OAuth discovery endpoints.
```mermaid
flowchart TD
A[Incoming MCP Request] --> B[Extract Client IP Address]
B --> C{Is IP in private ranges?}
C -->|Yes - Internal caller| D[Return ALL MCP servers]
C -->|No - External caller| E[Return ONLY servers with<br/>available_on_public_internet = true]
```
## Walkthrough
This walkthrough covers two flows:
1. **Adding a public MCP server** (DeepWiki) and connecting to it from ChatGPT
2. **Making an existing server private** (Exa) and verifying ChatGPT no longer sees it
### Flow 1: Add a Public MCP Server (DeepWiki)
DeepWiki is a free MCP server — a good candidate to expose publicly so AI gateway users can access it from ChatGPT.
#### Step 1: Create the MCP Server
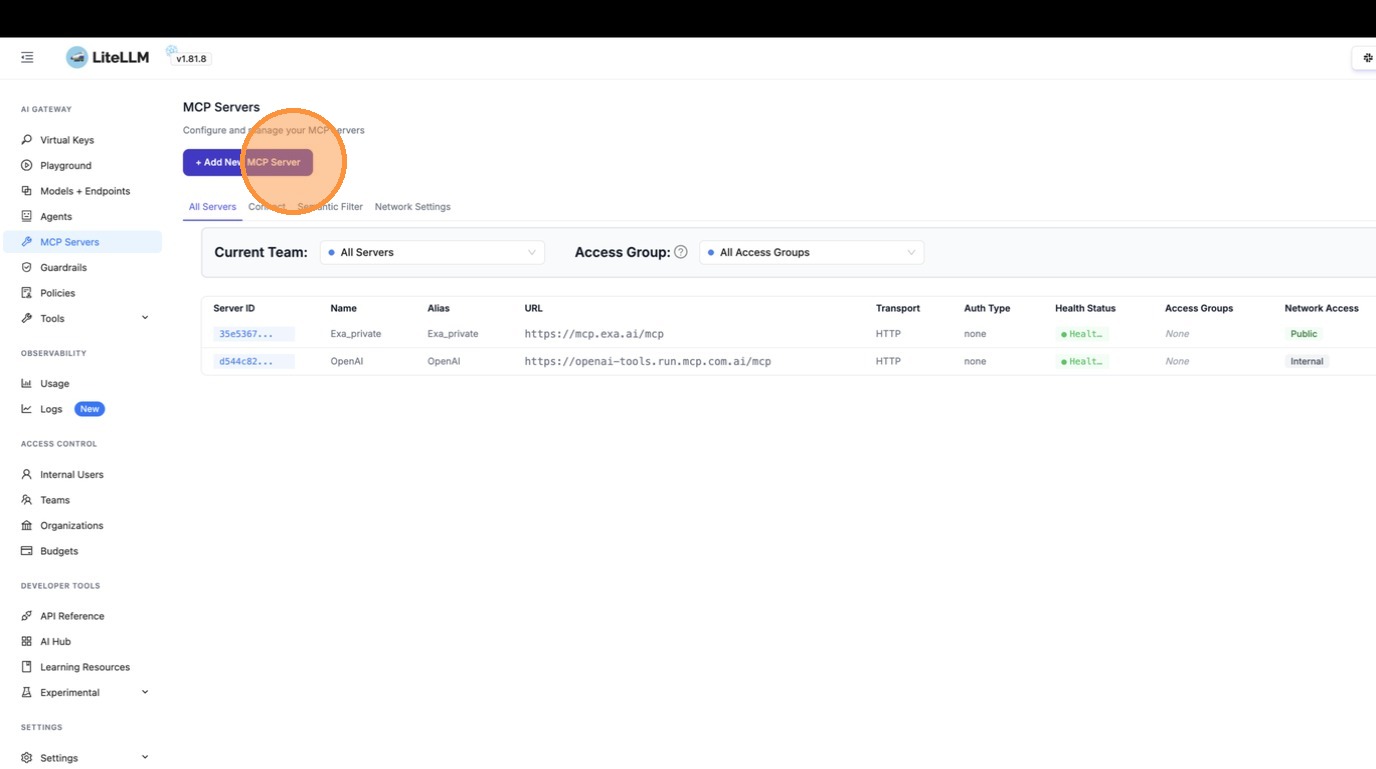
Navigate to the MCP Servers page and click **"+ Add New MCP Server"**.
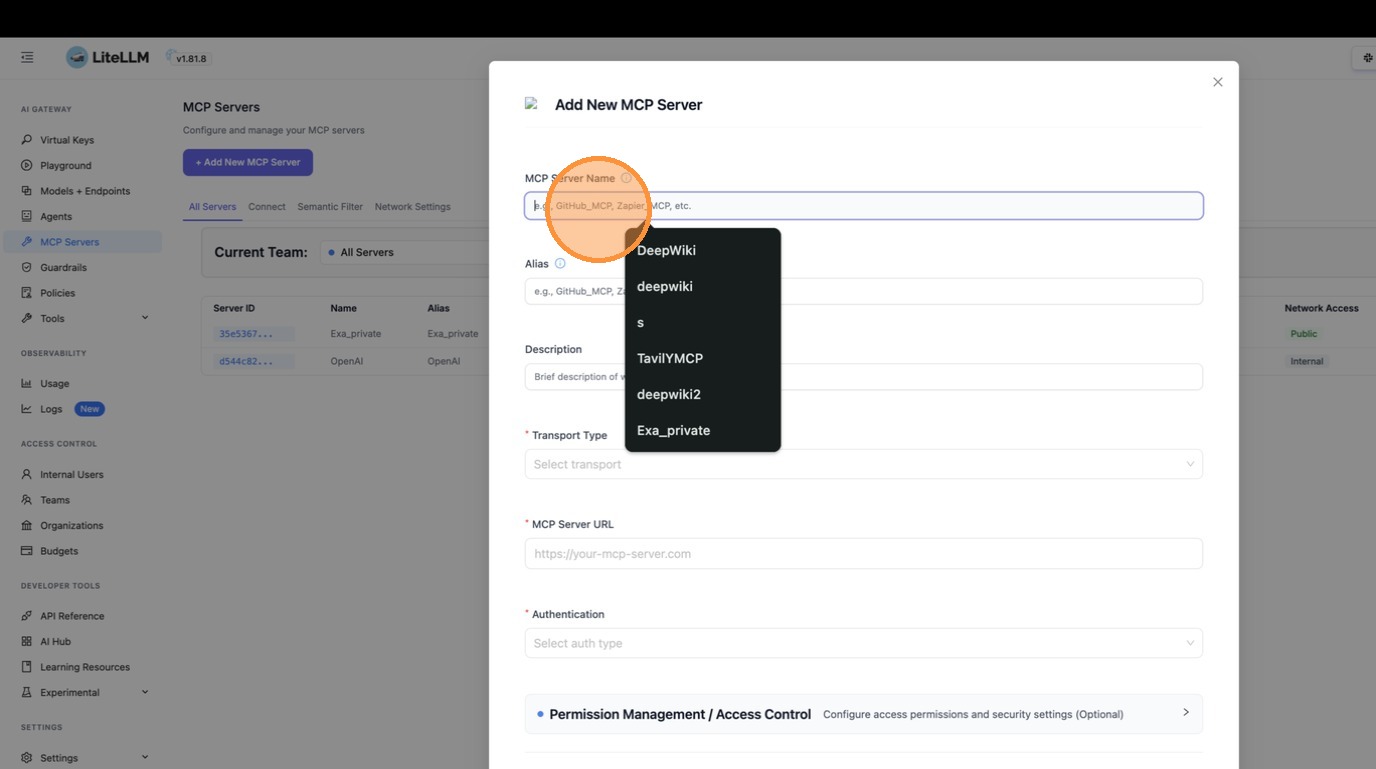
The create dialog opens. Enter **"DeepWiki"** as the server name.
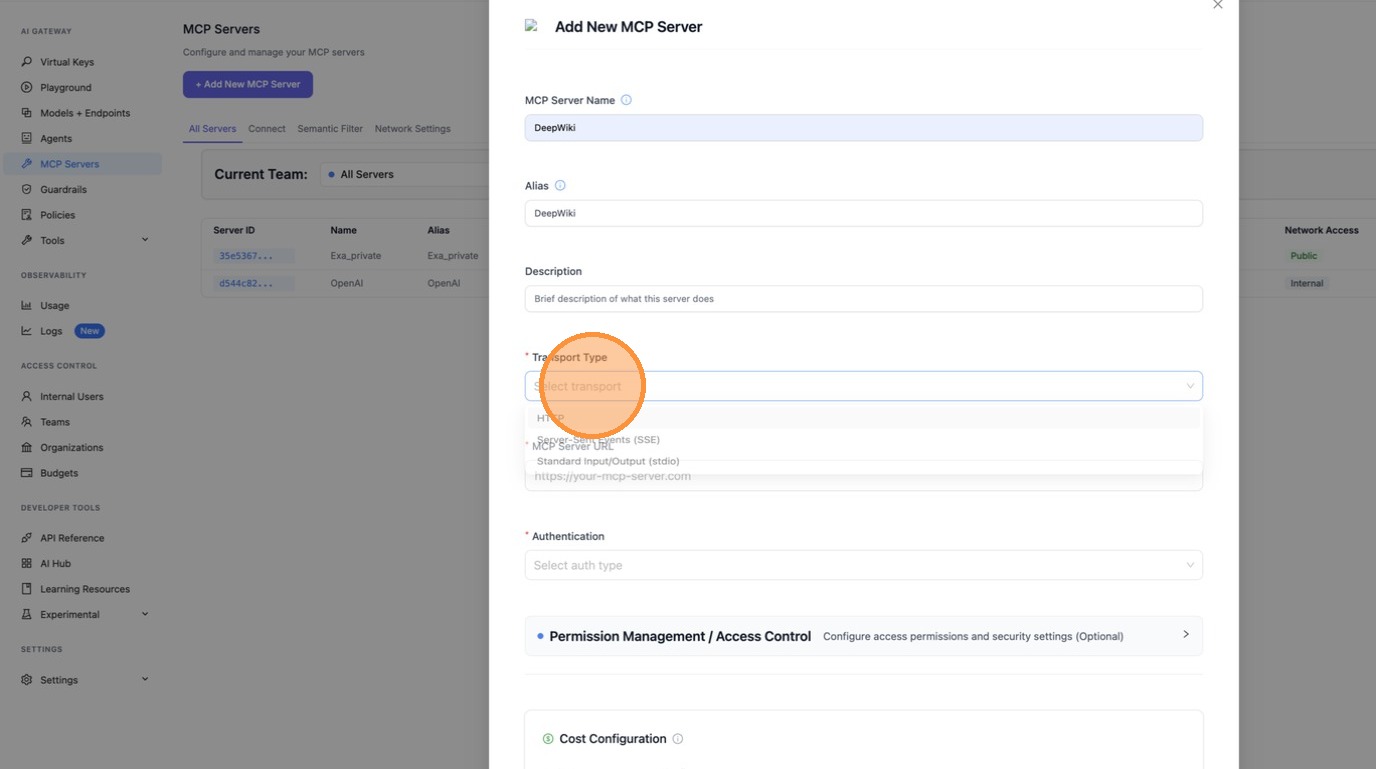
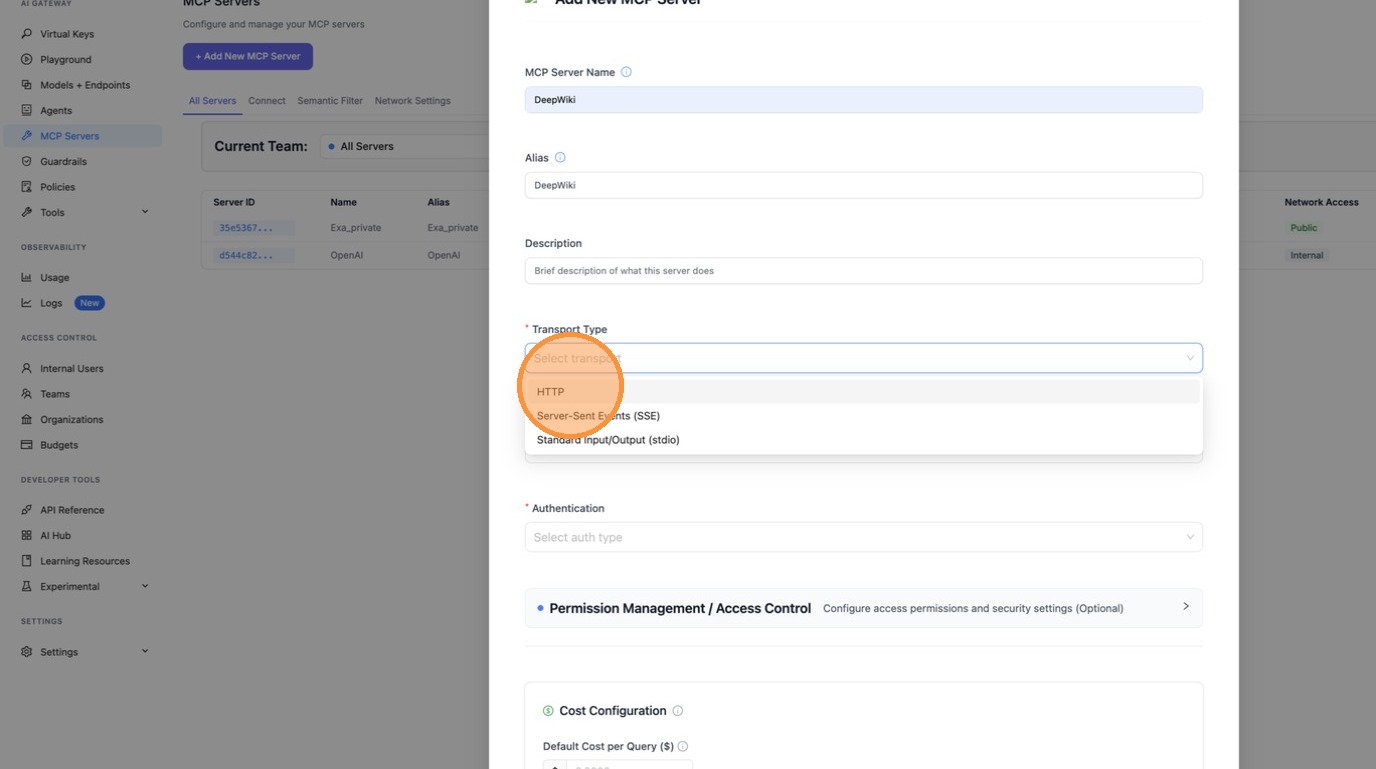
For the transport type dropdown, select **HTTP** since DeepWiki uses the Streamable HTTP transport.
Now scroll down to the MCP Server URL field.
Enter the DeepWiki MCP URL: `https://mcp.deepwiki.com/mcp`.
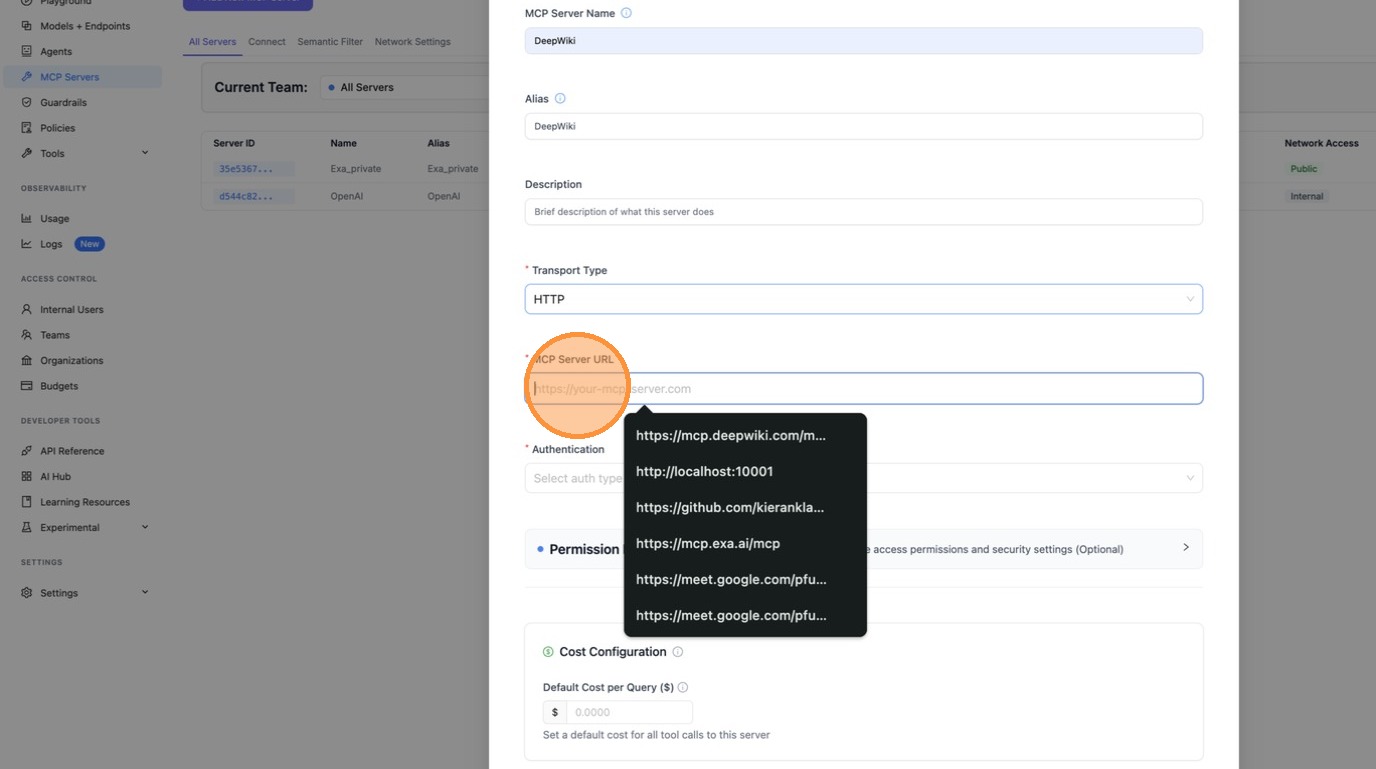
With the name, transport, and URL filled in, the basic server configuration is complete.
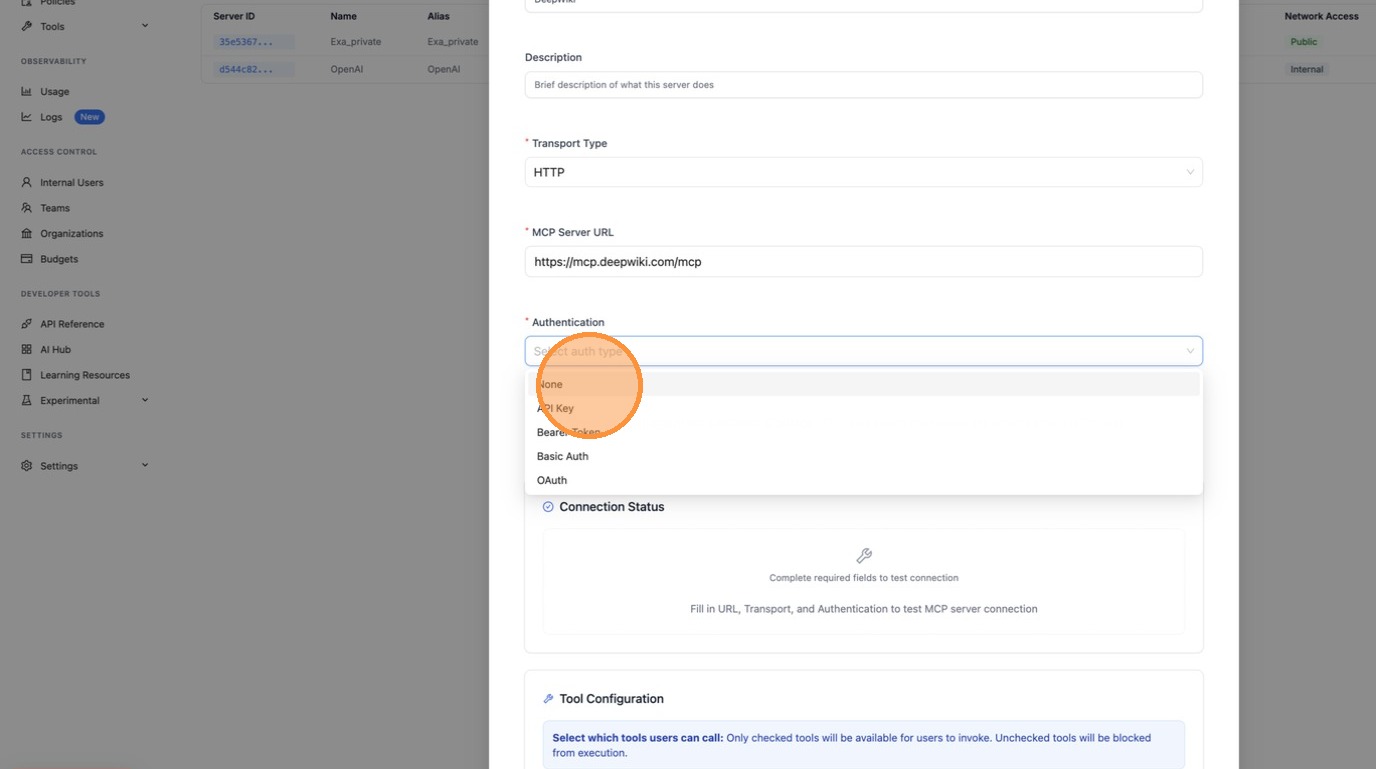
#### Step 2: Enable "Available on Public Internet"
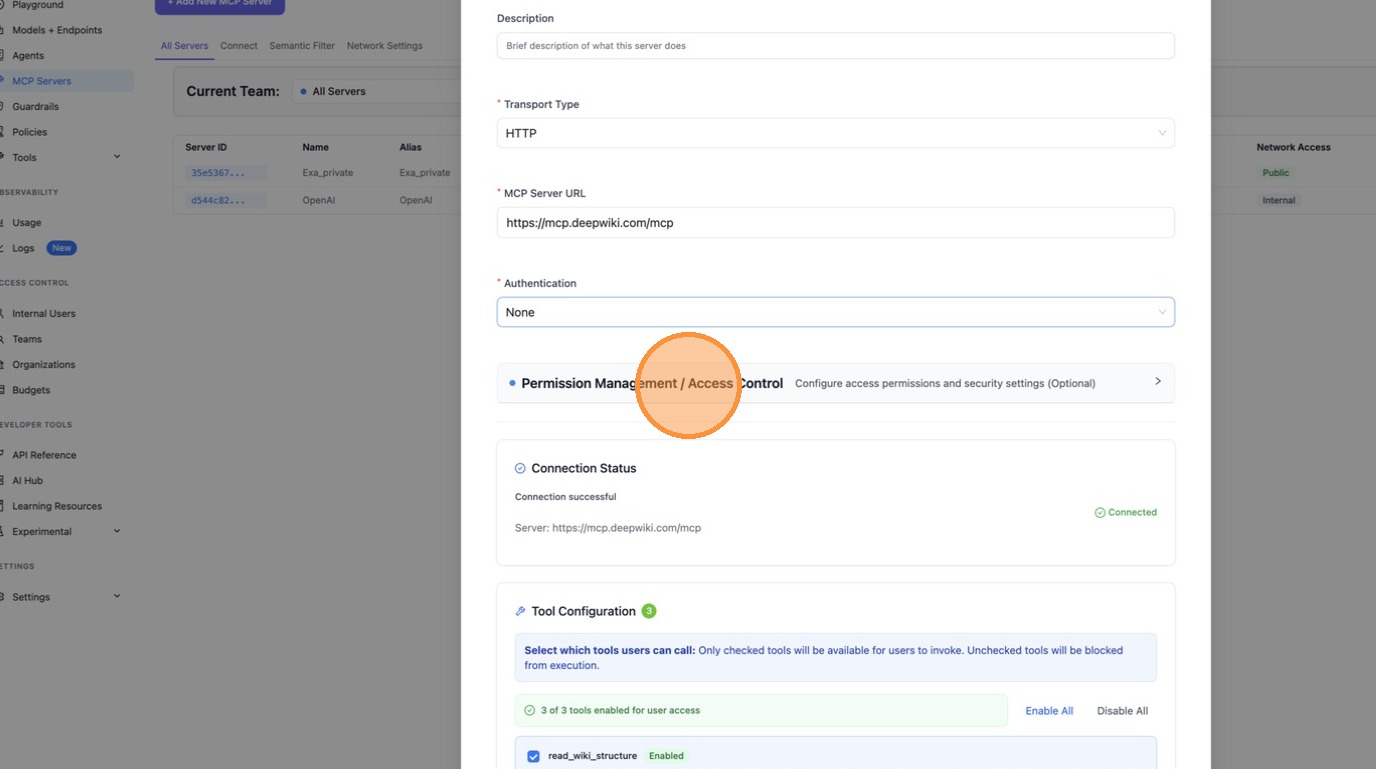
Before creating, scroll down and expand the **Permission Management / Access Control** section. This is where you control who can see this server.
Toggle **"Available on Public Internet"** on. This is the key setting — it tells LiteLLM that external callers (like ChatGPT connecting from the public internet) should be able to discover and use this server.
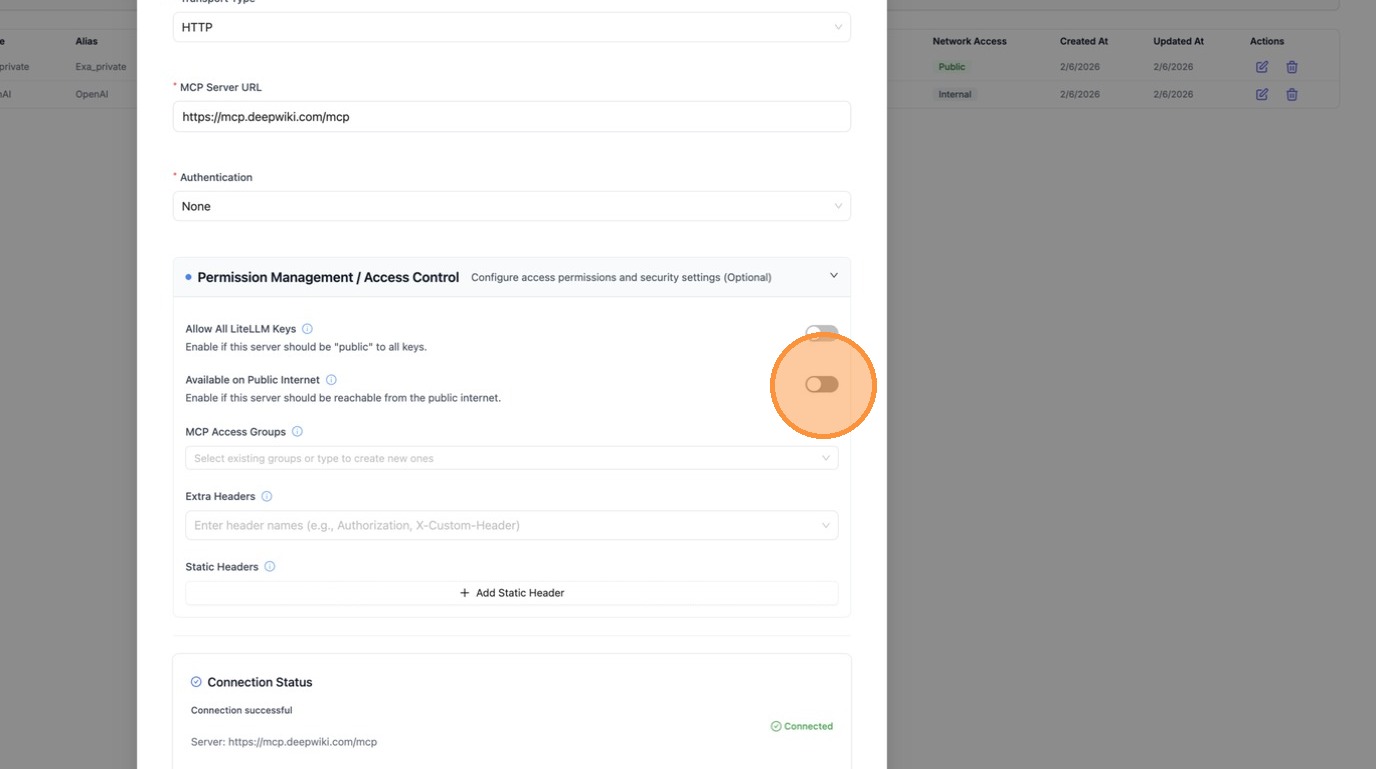
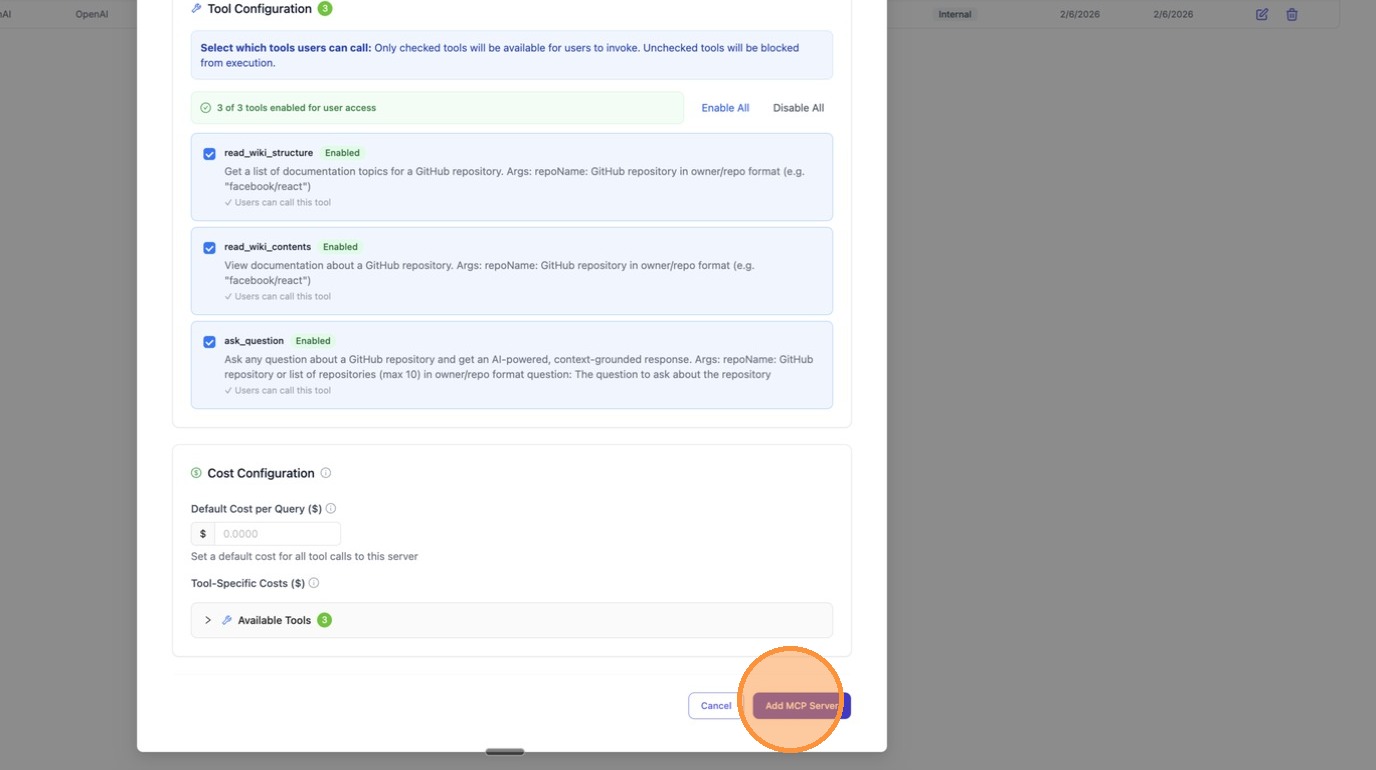
With the toggle enabled, click **"Create"** to save the server.
#### Step 3: Connect from ChatGPT
Now let's verify it works. Open ChatGPT and look for the MCP server icon to add a new connection. The endpoint to use is `<your-litellm-url>/mcp`.
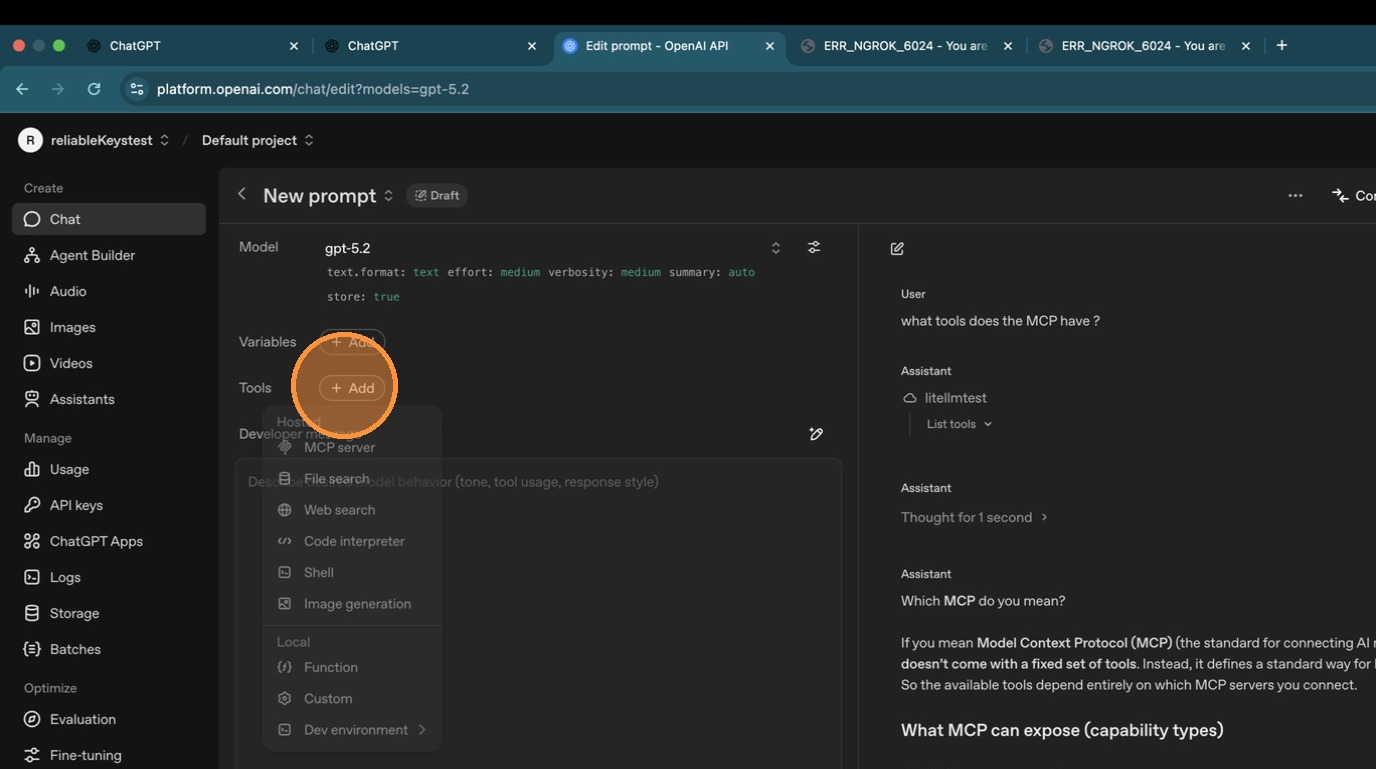
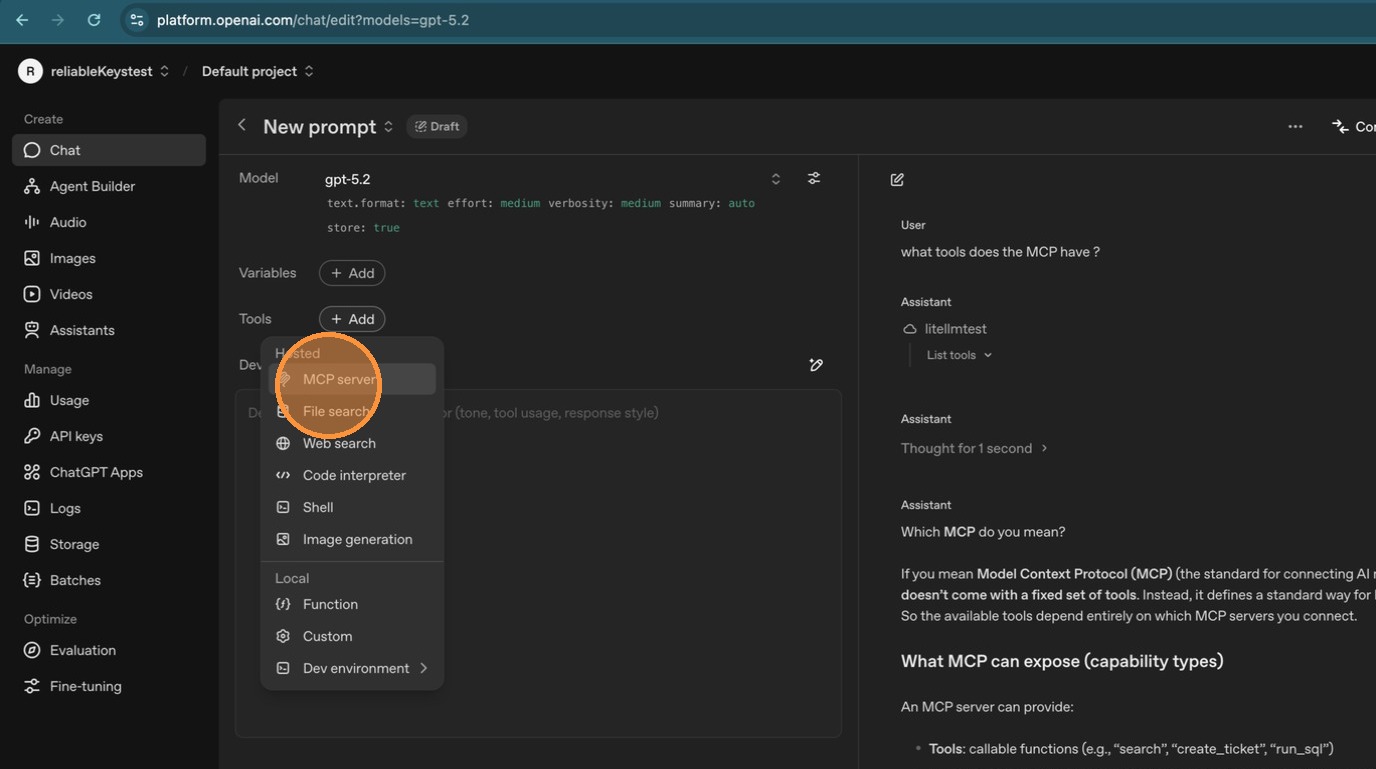
In the dropdown, select **"Add an MCP server"** to configure a new connection.
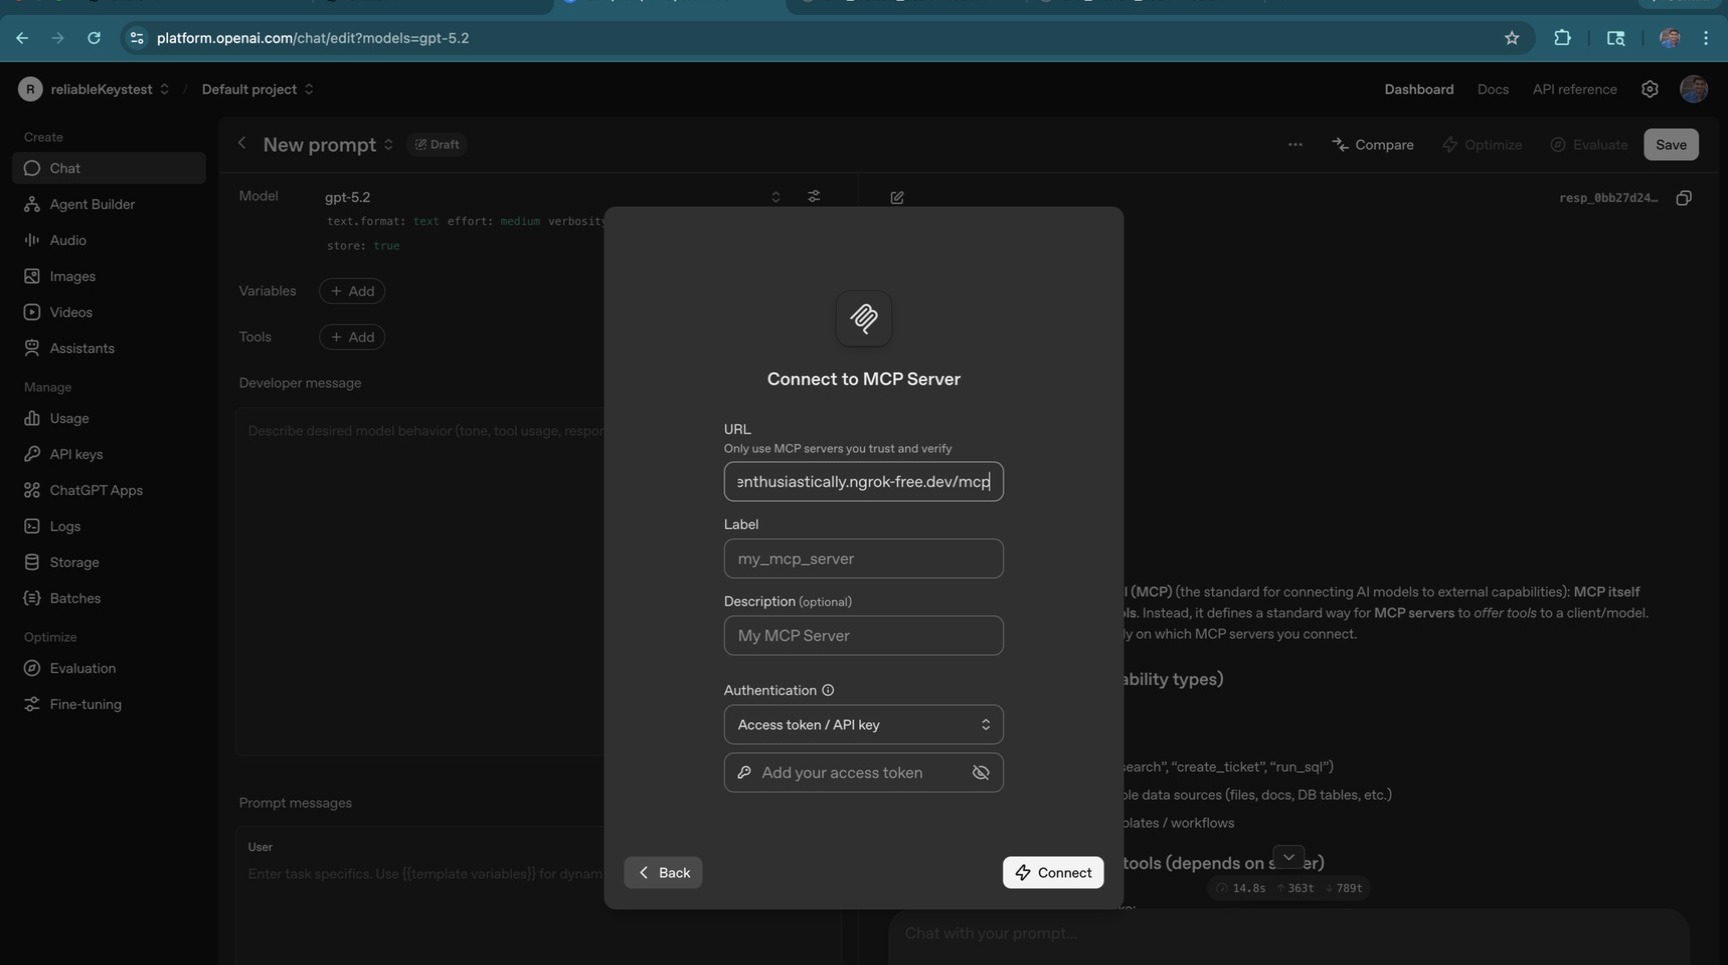
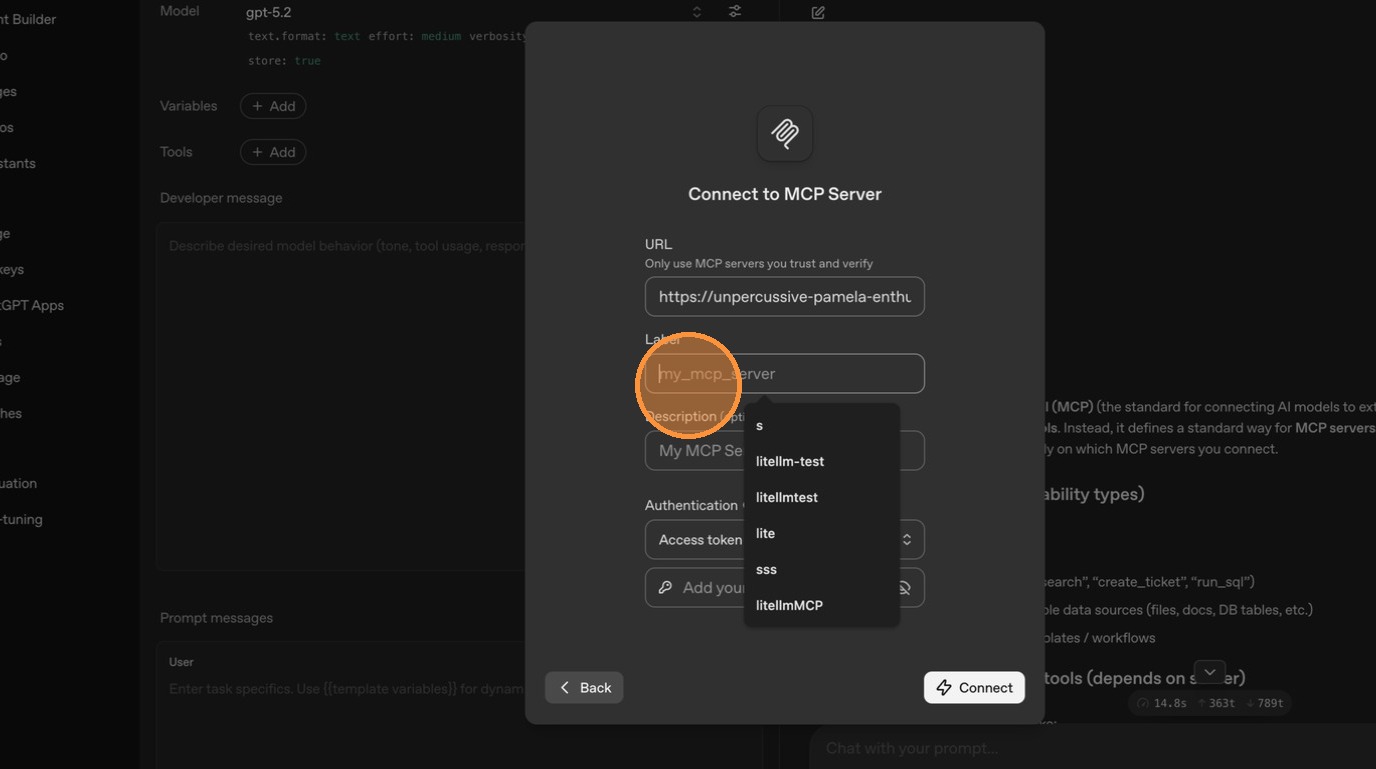
ChatGPT asks for a server label. Give it a recognizable name like "LiteLLM".
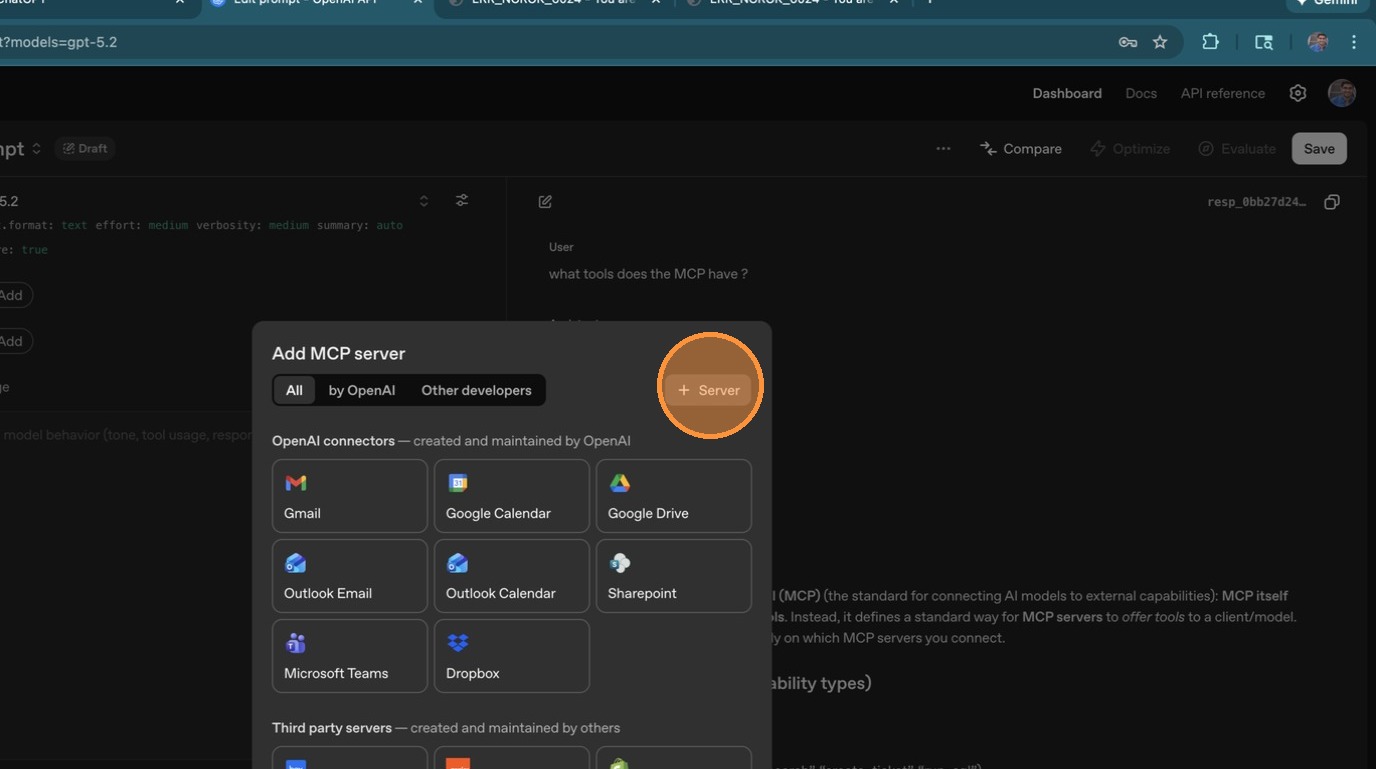
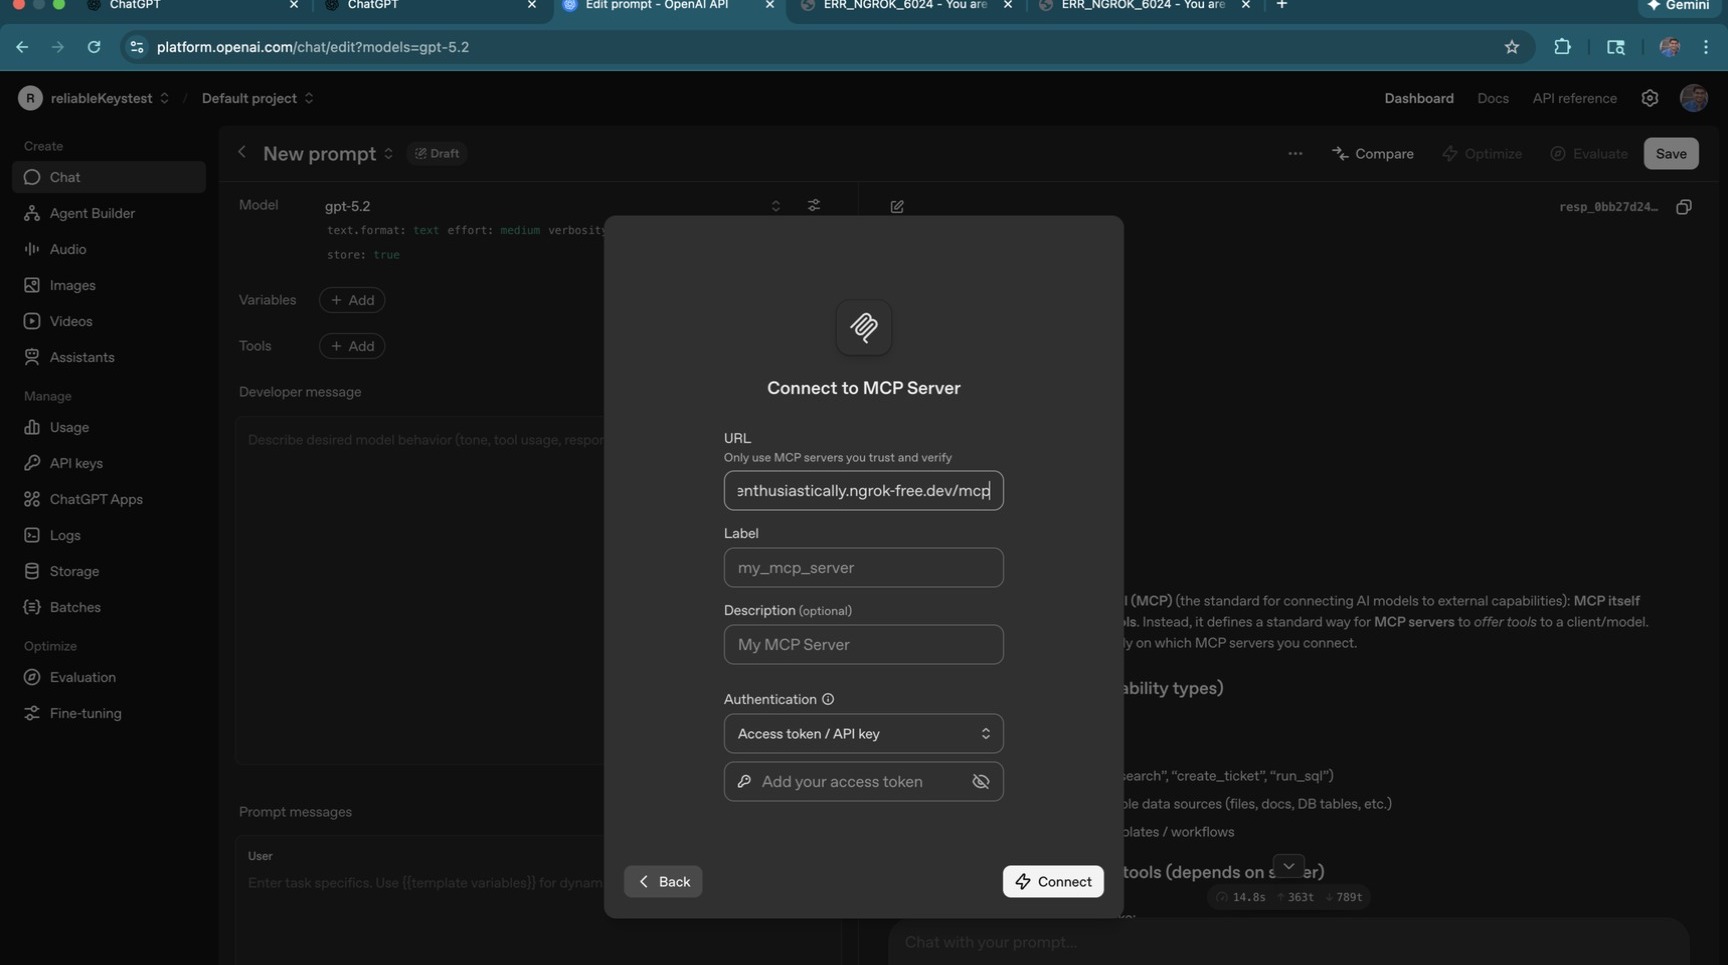
Next, enter the Server URL. This should be your LiteLLM proxy's MCP endpoint — `<your-litellm-url>/mcp`.
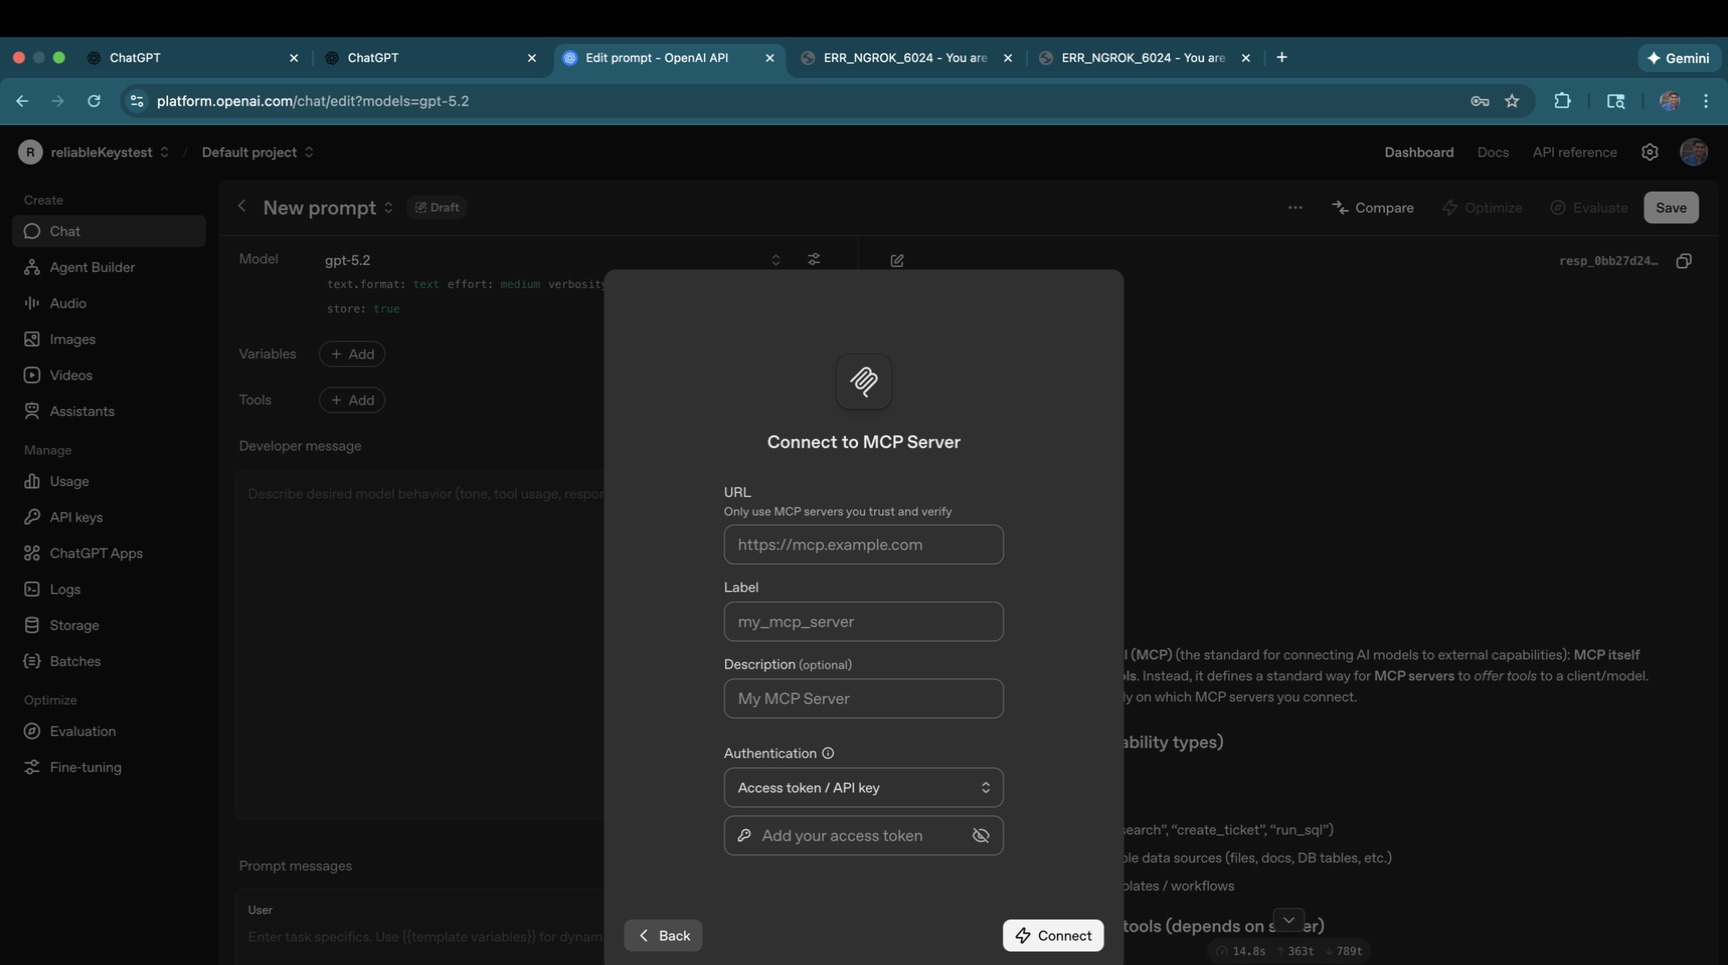
Paste your LiteLLM URL and confirm it looks correct.
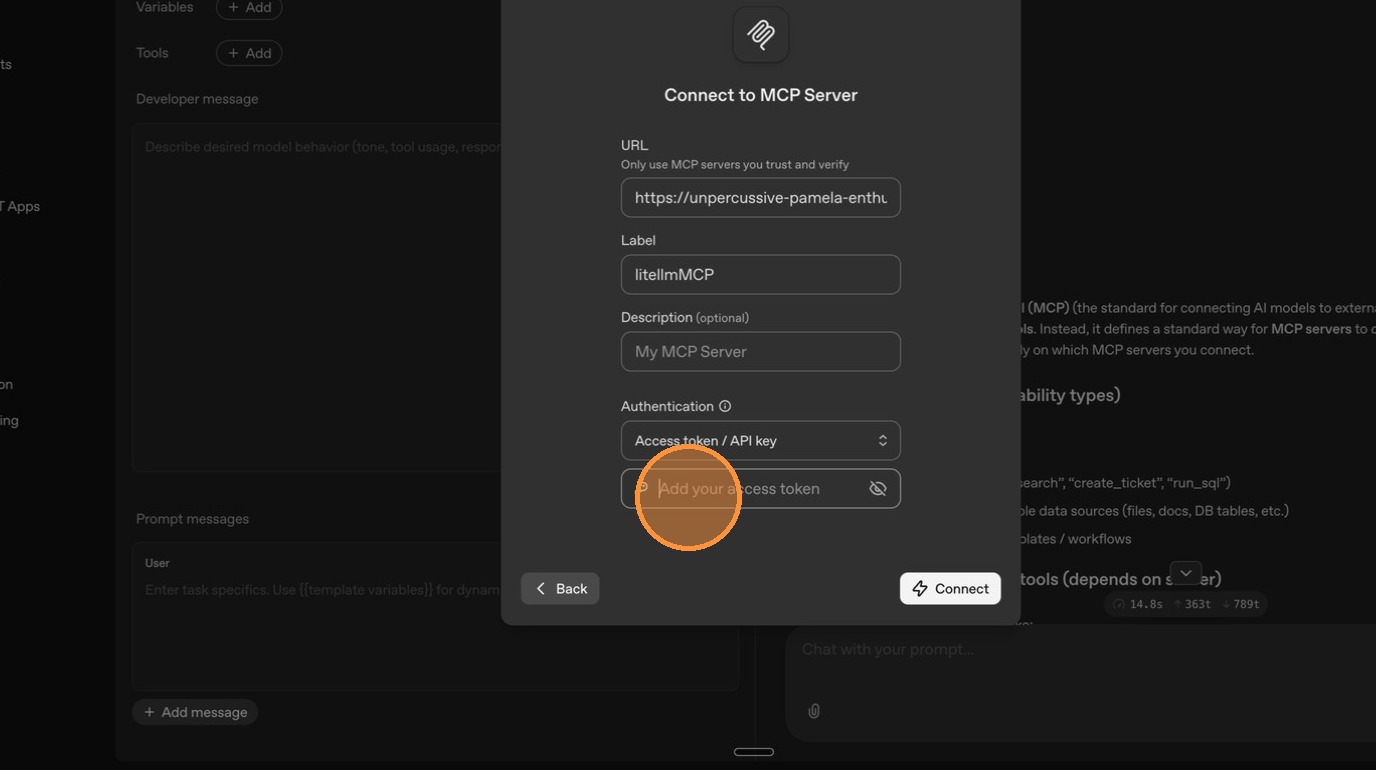
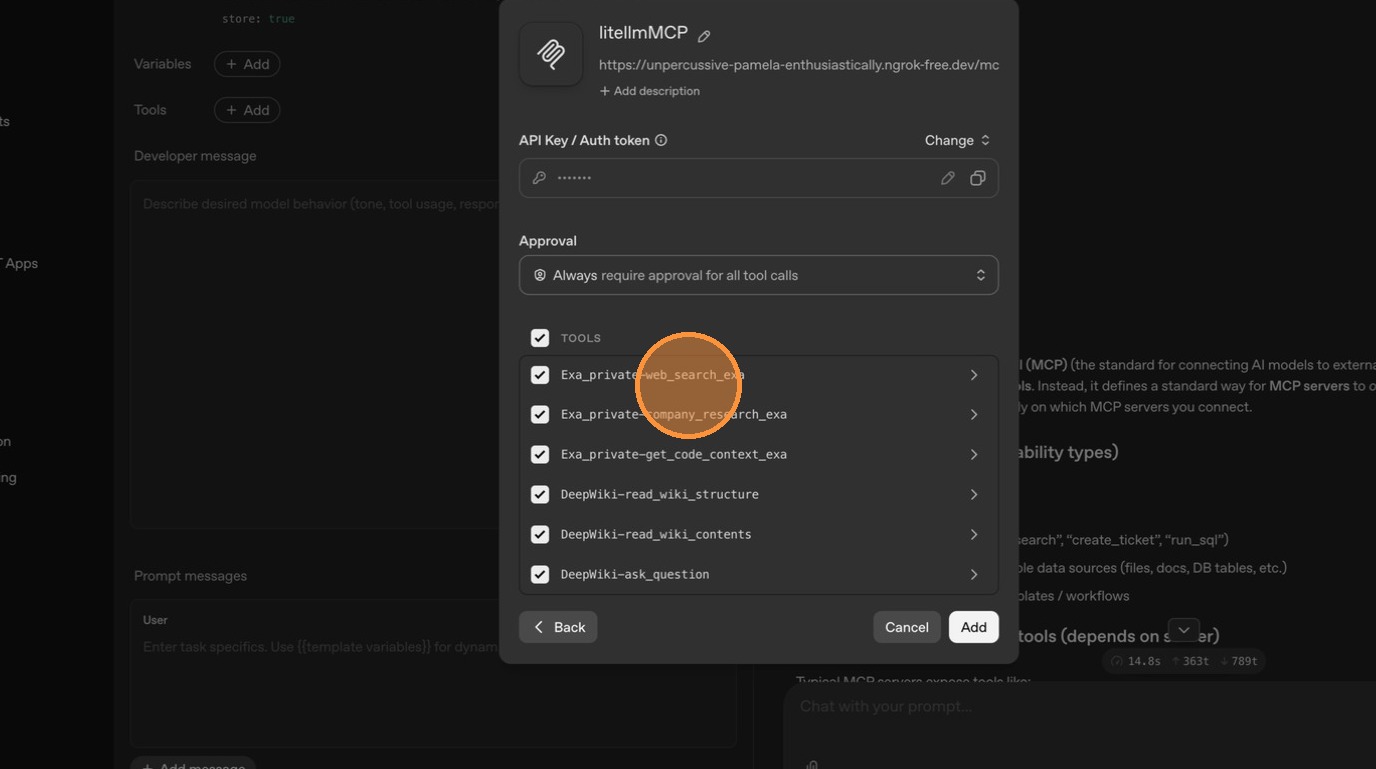
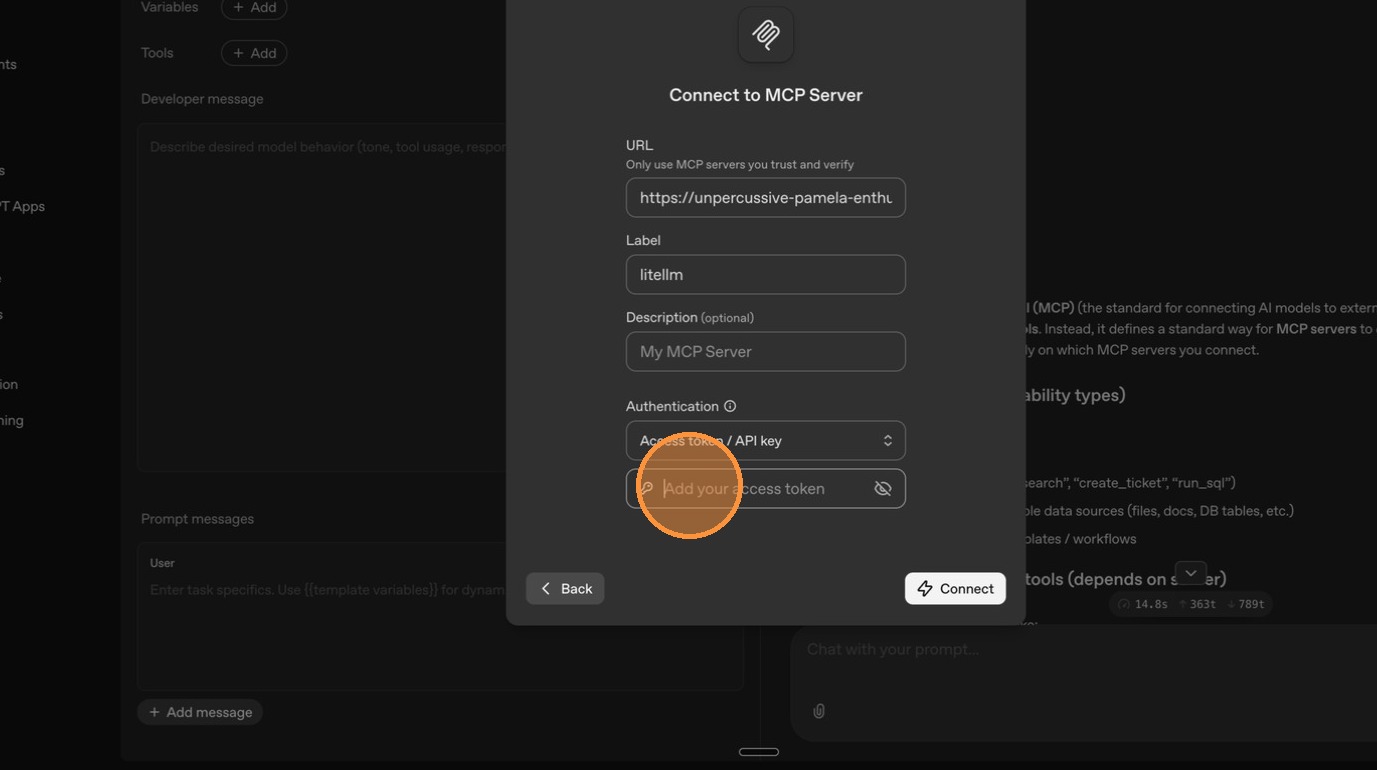
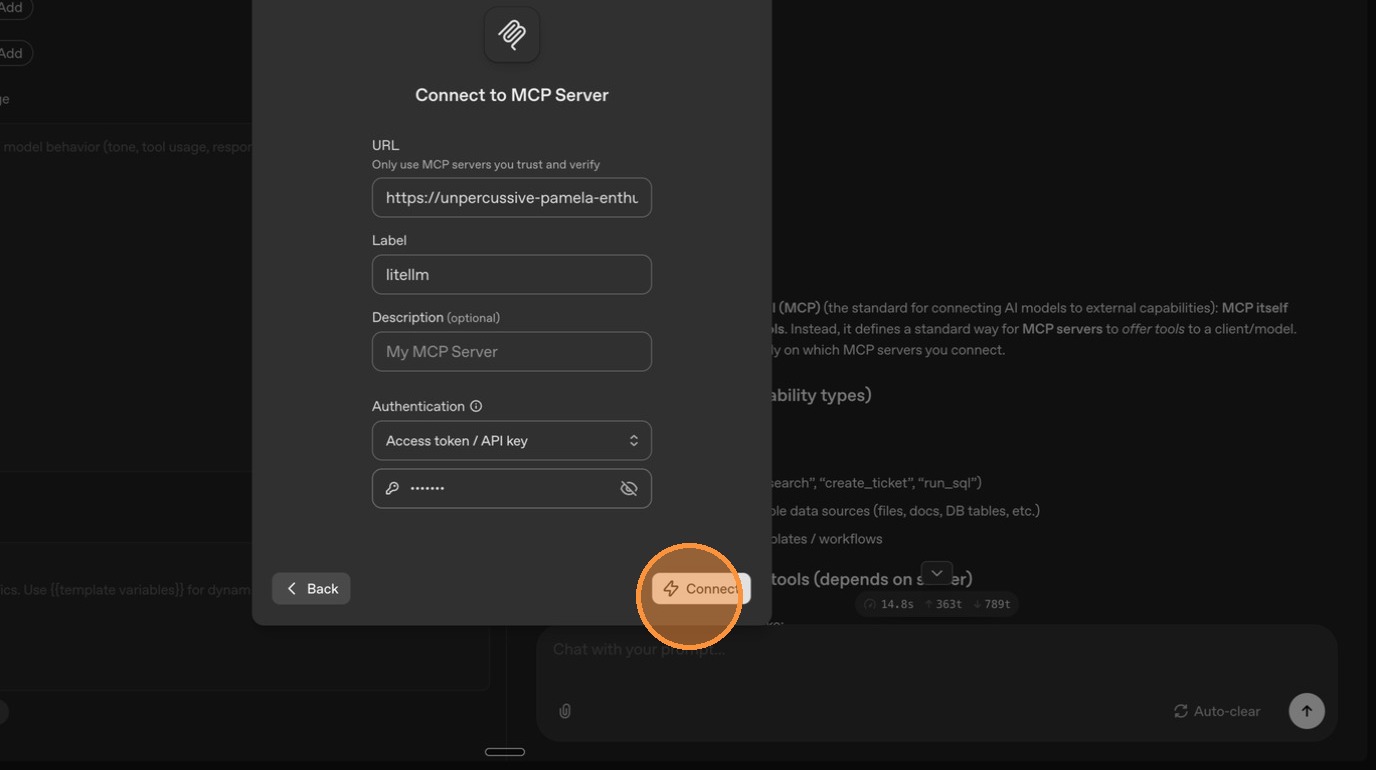
ChatGPT also needs authentication. Enter your LiteLLM API key in the authentication field so it can connect to the proxy.
Click **"Connect"** to establish the connection.
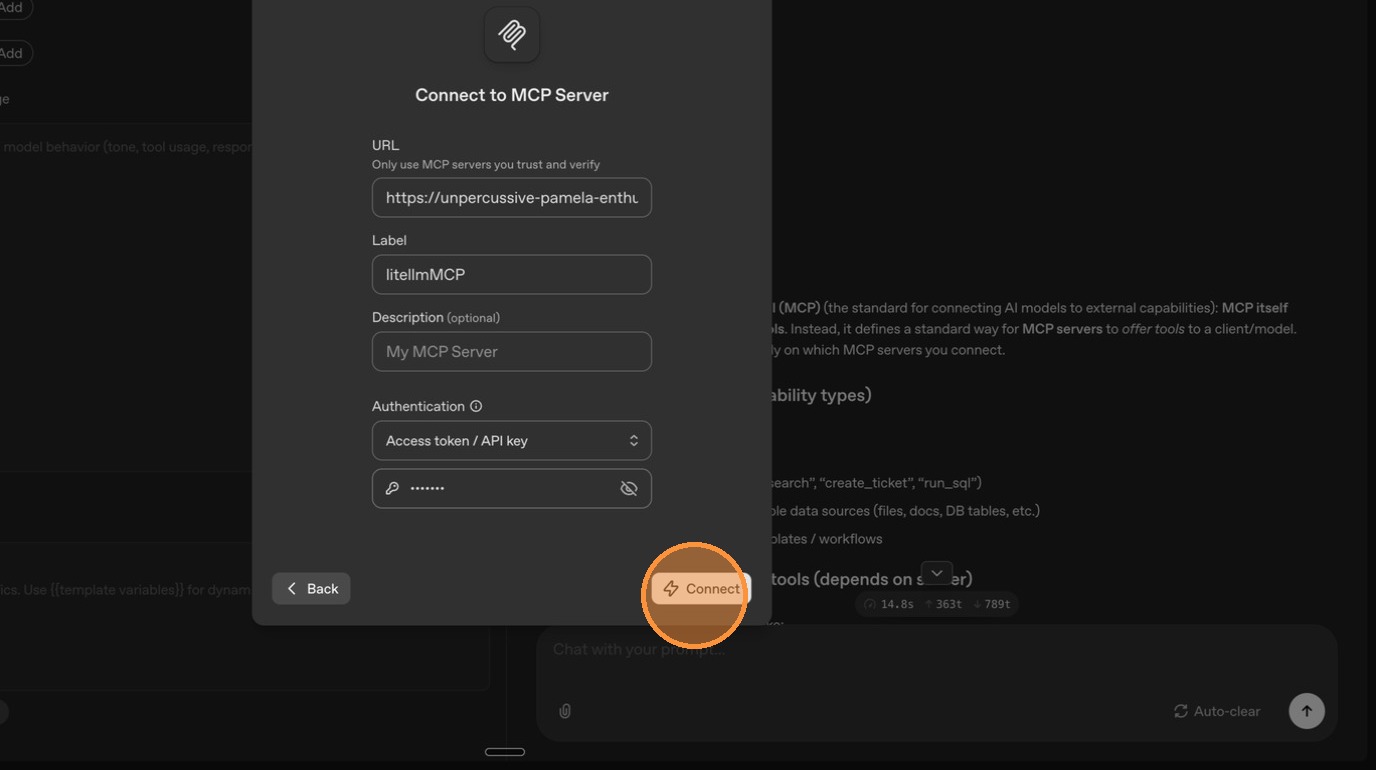
ChatGPT connects and shows the available tools. Since both DeepWiki and Exa are currently marked as public, ChatGPT can see tools from both servers.
---
### Flow 2: Make an Existing Server Private (Exa)
Now let's do the reverse — take an existing MCP server (Exa) that's currently public and restrict it to internal access only. After this change, ChatGPT should no longer see Exa's tools.
#### Step 1: Edit the Server
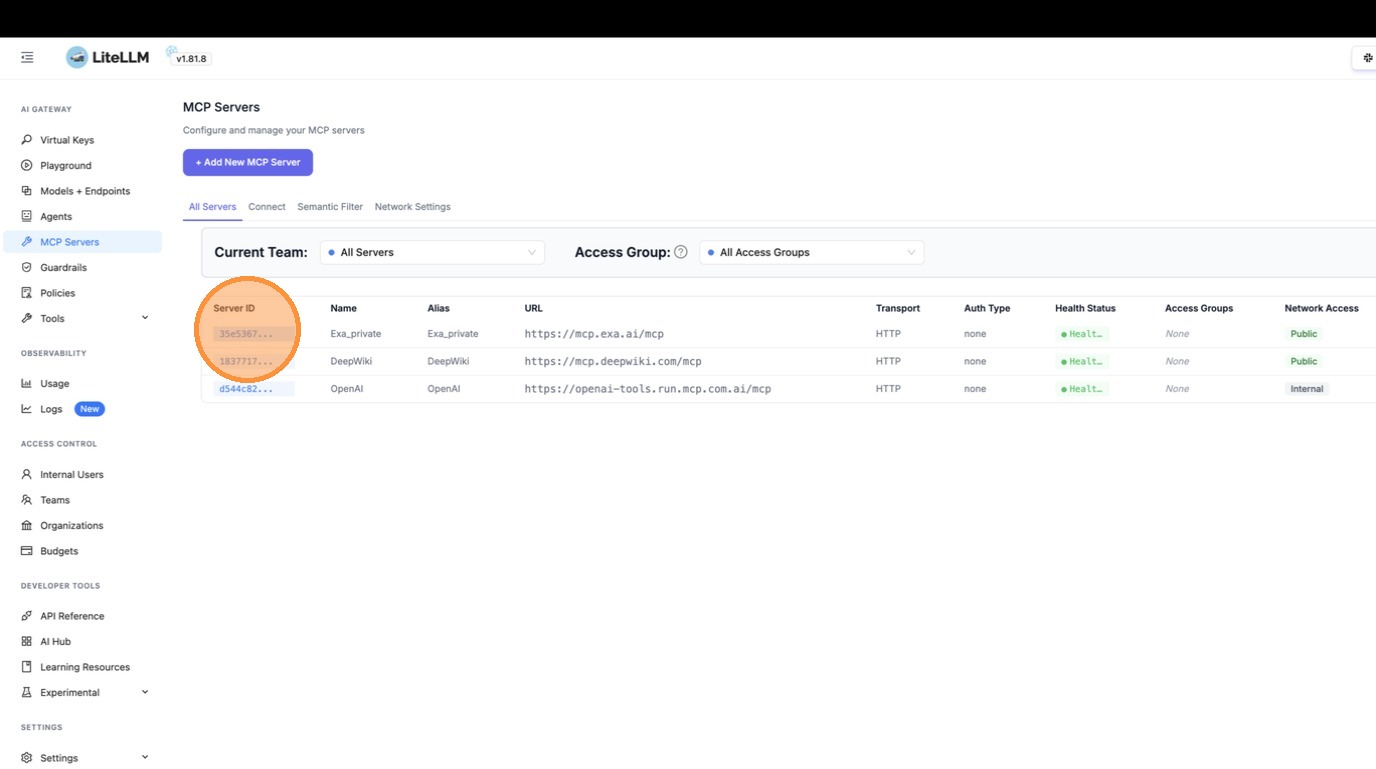
Go to the MCP Servers table and click on the Exa server to open its detail view.
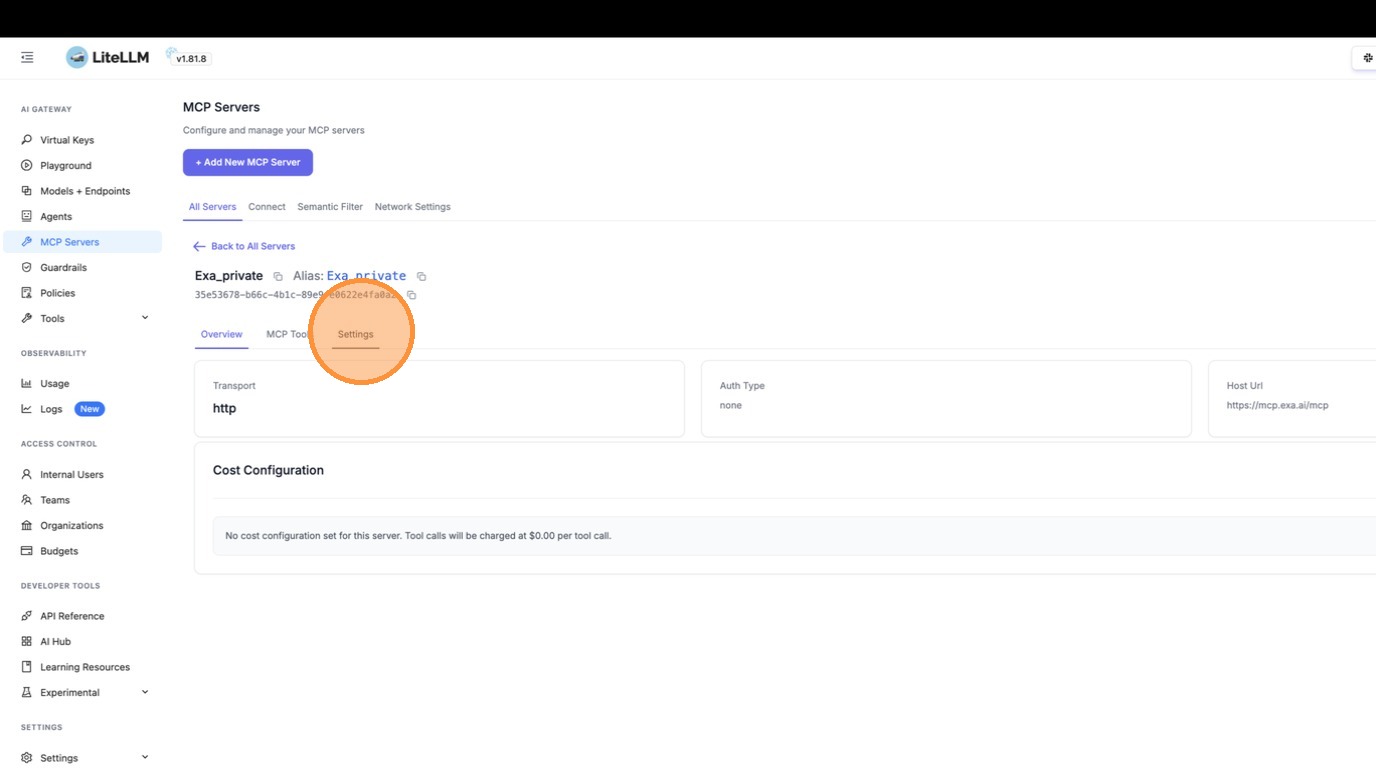
Switch to the **"Settings"** tab to access the edit form.
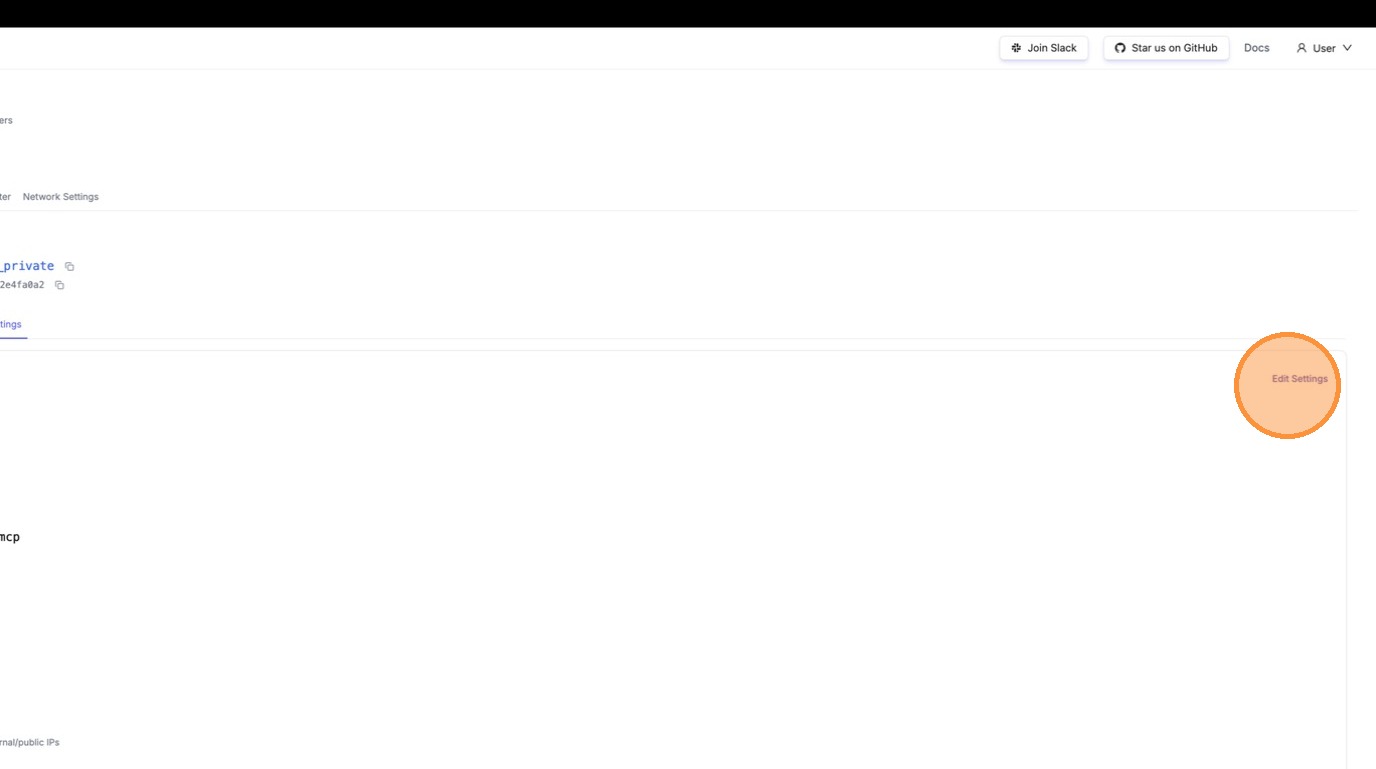
The edit form loads with Exa's current configuration.
#### Step 2: Toggle Off "Available on Public Internet"
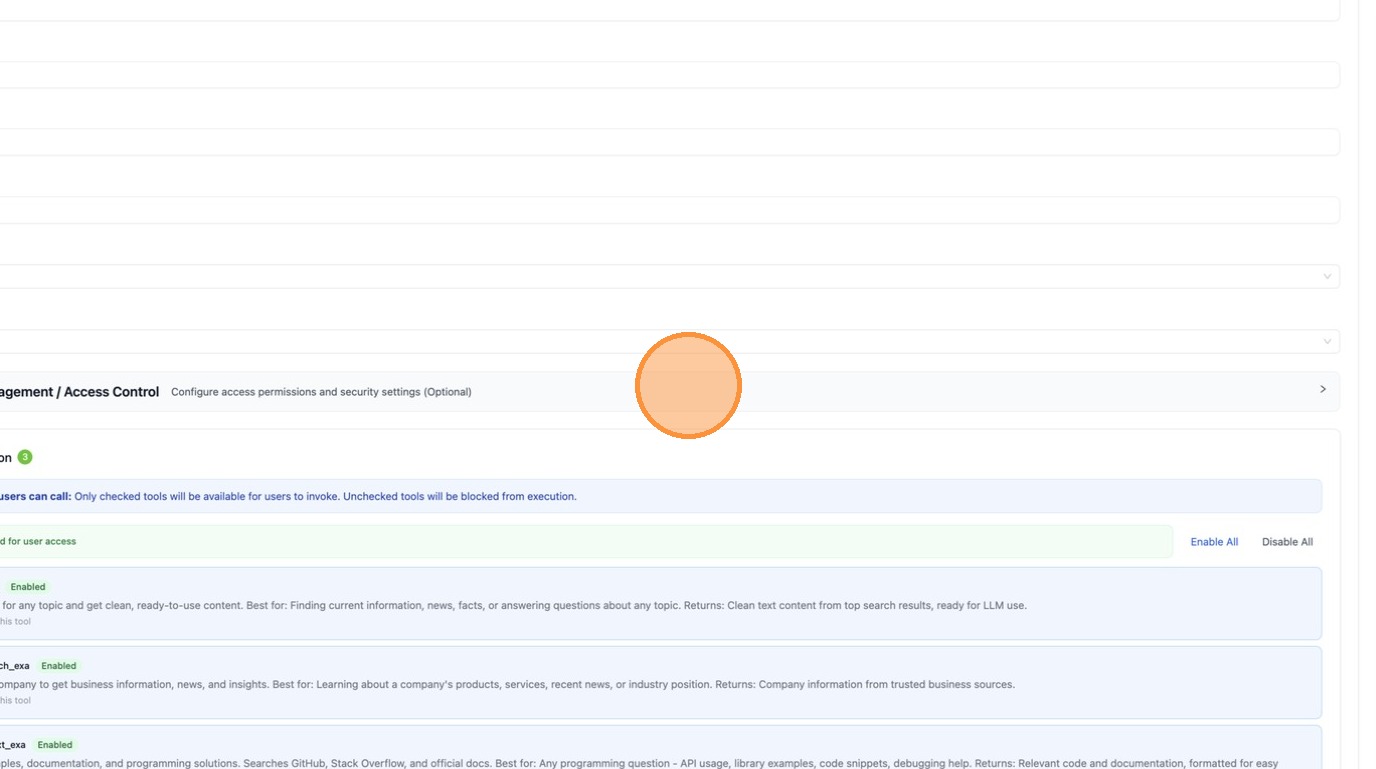
Scroll down and expand the **Permission Management / Access Control** section to find the public internet toggle.
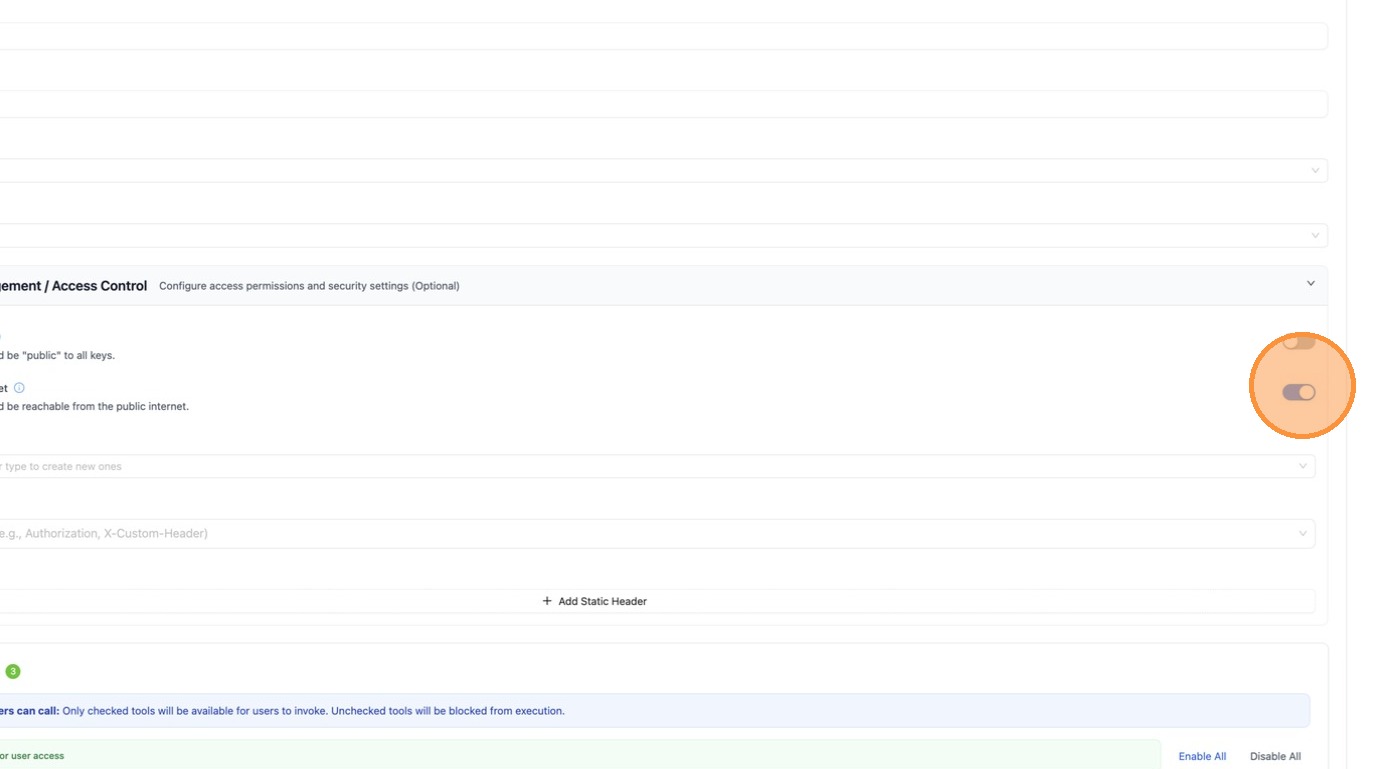
Toggle **"Available on Public Internet"** off. This will hide Exa from any caller outside your private network.
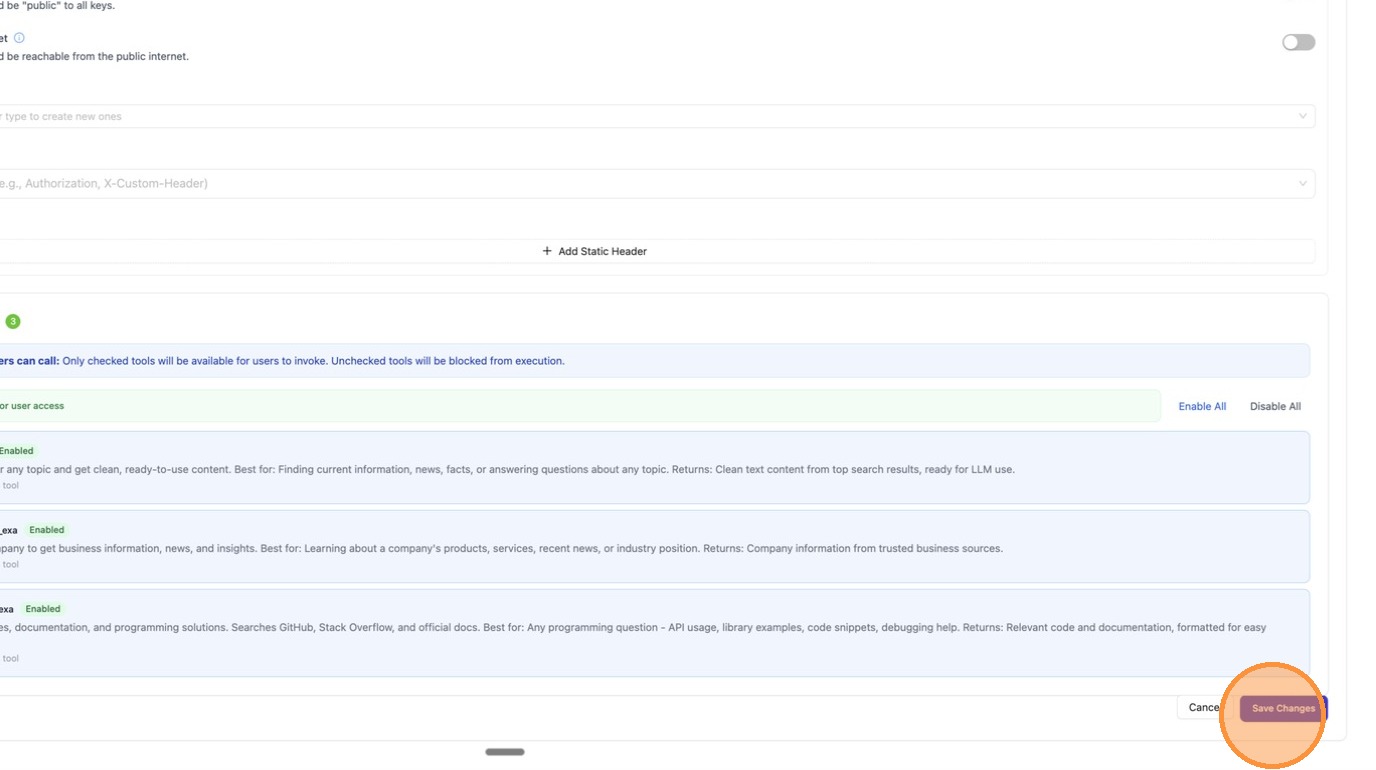
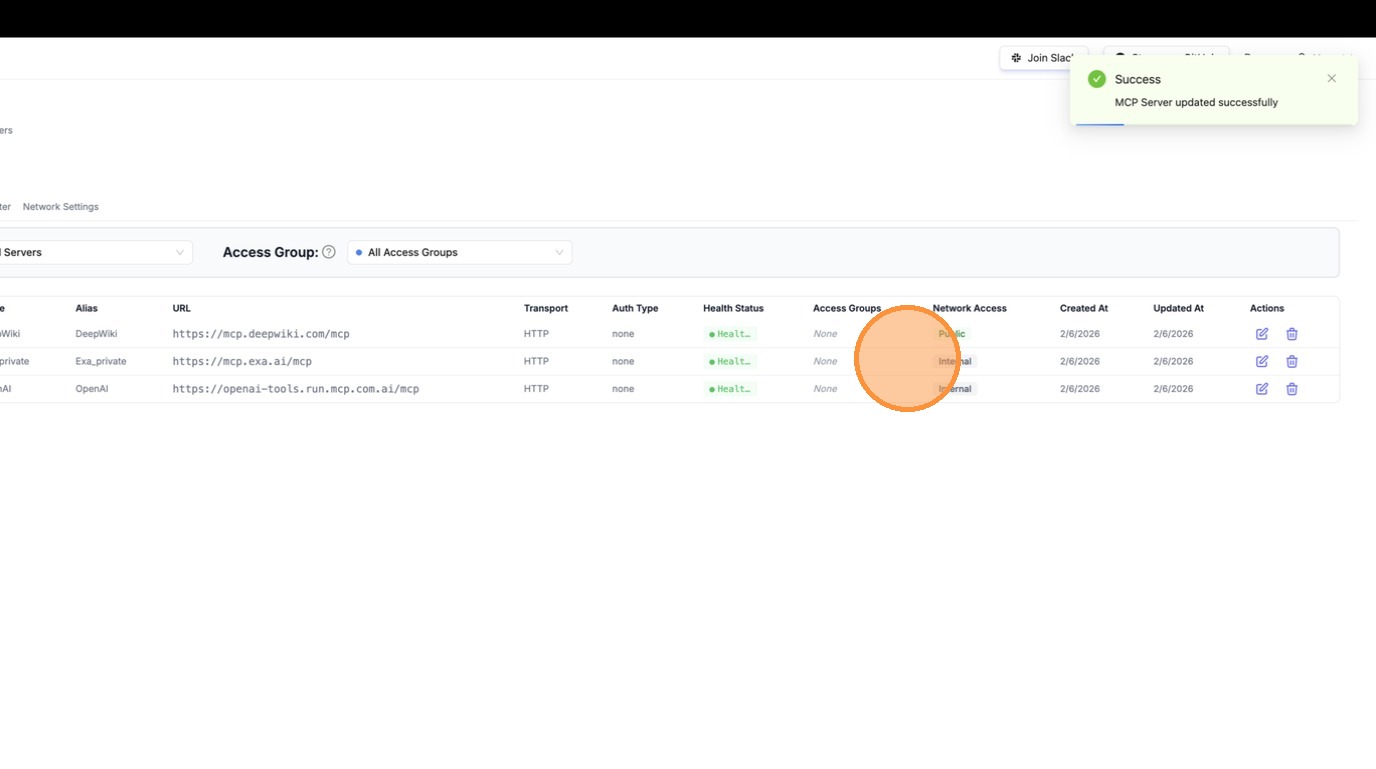
Click **"Save Changes"** to apply. The change takes effect immediately — no proxy restart needed.
#### Step 3: Verify in ChatGPT
Go back to ChatGPT to confirm Exa is no longer visible. You'll need to reconnect for ChatGPT to re-fetch the tool list.
Open the MCP server settings and select to add or reconnect a server.
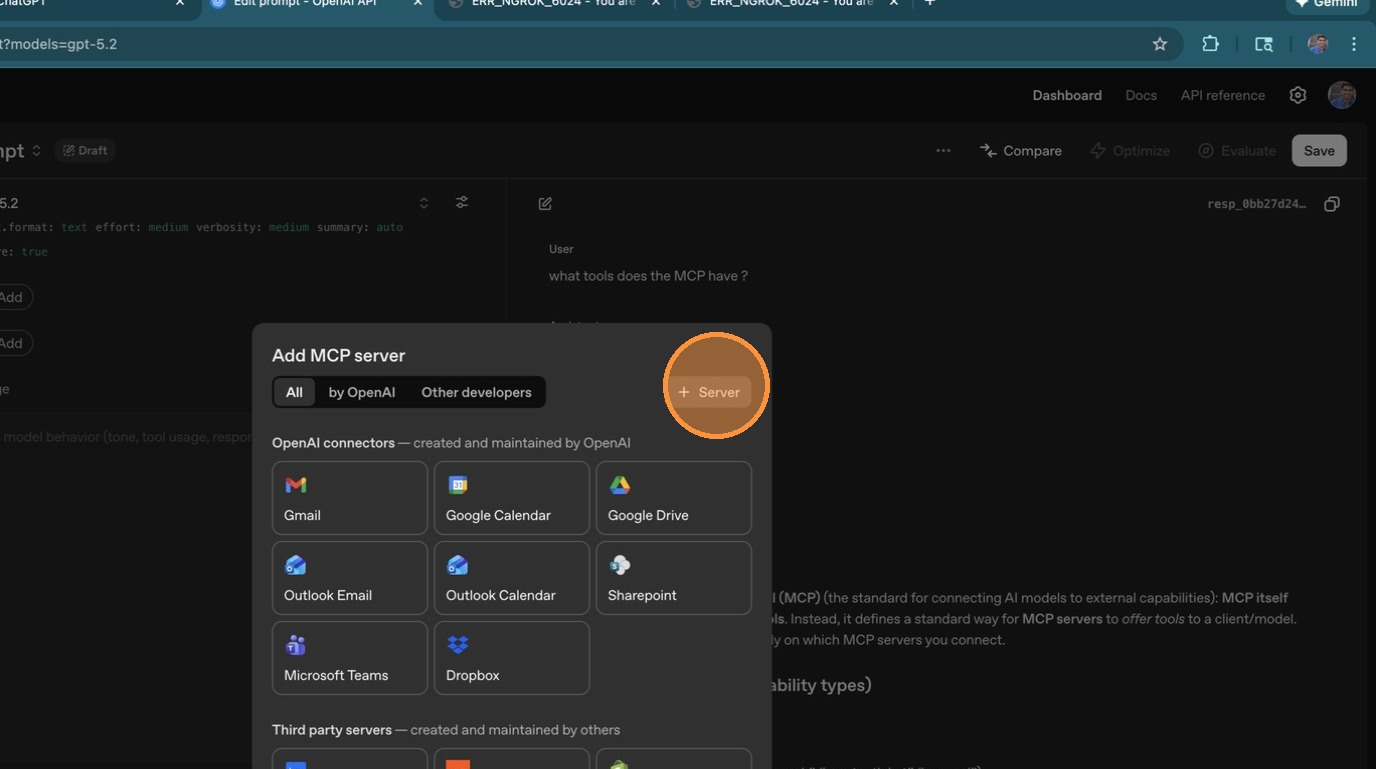
Enter the same LiteLLM MCP URL as before.
Set the server label.
Enter your API key for authentication.
Click **"Connect"** to re-establish the connection.
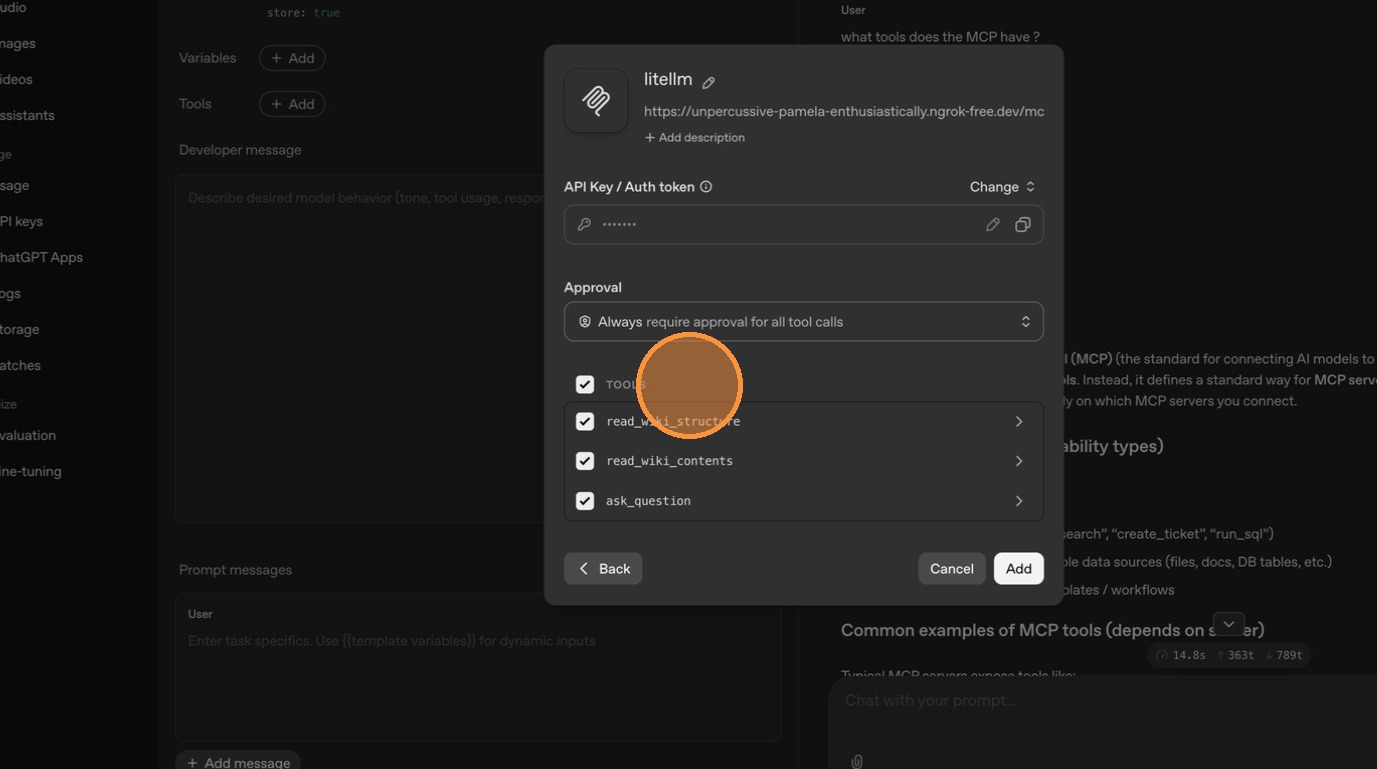
This time, only DeepWiki's tools appear — Exa is gone. LiteLLM detected that ChatGPT is calling from a public IP and filtered out Exa since it's no longer marked as public. Internal users on your private network would still see both servers.
## Configuration Reference
### Per-Server Setting
<Tabs>
<TabItem value="ui" label="UI">
Toggle **"Available on Public Internet"** in the Permission Management section when creating or editing an MCP server.
</TabItem>
<TabItem value="config" label="config.yaml">
```yaml title="config.yaml" showLineNumbers
mcp_servers:
deepwiki:
url: https://mcp.deepwiki.com/mcp
available_on_public_internet: true # visible to external callers
exa:
url: https://exa.ai/mcp
auth_type: api_key
auth_value: os.environ/EXA_API_KEY
available_on_public_internet: false # internal only (default)
```
</TabItem>
<TabItem value="api" label="API">
```bash title="Create a public MCP server" showLineNumbers
curl -X POST <your-litellm-url>/v1/mcp/server \
-H "Authorization: Bearer sk-..." \
-H "Content-Type: application/json" \
-d '{
"server_name": "DeepWiki",
"url": "https://mcp.deepwiki.com/mcp",
"transport": "http",
"available_on_public_internet": true
}'
```
```bash title="Update an existing server" showLineNumbers
curl -X PUT <your-litellm-url>/v1/mcp/server \
-H "Authorization: Bearer sk-..." \
-H "Content-Type: application/json" \
-d '{
"server_id": "<server-id>",
"available_on_public_internet": false
}'
```
</TabItem>
</Tabs>
### Custom Private IP Ranges
By default, LiteLLM treats RFC 1918 private ranges as internal. You can customize this in the **Network Settings** tab under MCP Servers, or via config:
```yaml title="config.yaml" showLineNumbers
general_settings:
mcp_internal_ip_ranges:
- "10.0.0.0/8"
- "172.16.0.0/12"
- "192.168.0.0/16"
- "100.64.0.0/10" # Add your VPN/Tailscale range
```
When empty, the standard private ranges are used (`10.0.0.0/8`, `172.16.0.0/12`, `192.168.0.0/16`, `127.0.0.0/8`).

